Sep 29, 2016

Me & You


Scrapbook Layout created for Scrapbook Nerd - Me & You -


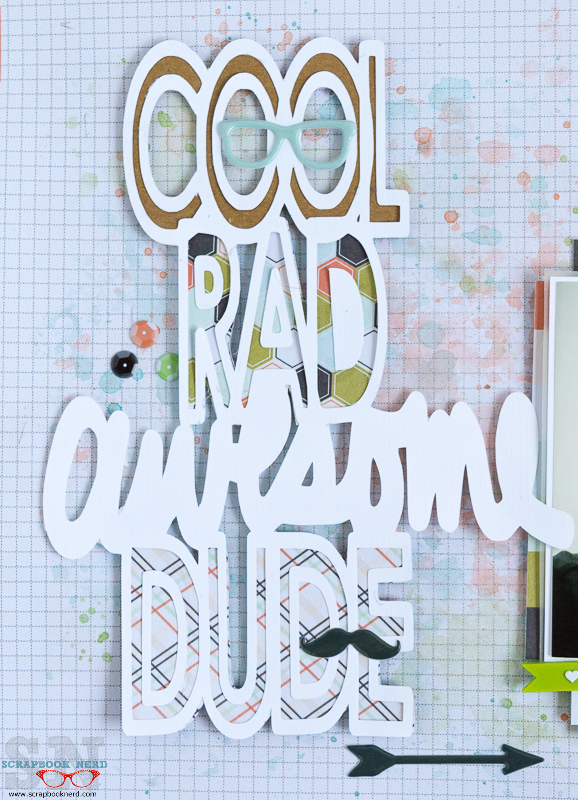
A close up to the layout.


Hi!

My kids are now in high school,  and i am home with my chores, and my baby.  So as my reveal week starts over at Scrapbook Nerd, I decided to document a picture of my fur baby and me.  


the inside heart of the cut out was stitched with matching embroidery thread.


For this project, I chose to use Doodlebug's Puppy Love collection (I was drawn to the cutesy designs, and vibrant colors).   To start, I created the background using The Cut Shoppe's Sassy Circles cut file.  I chose to  move the circles around, and resize them so that they only sat on the top of the layout.


a few small details is all the circles needed.

Each circle was backed with different papers from the collection.   The inside heart of the circle was stitched with the same colors as the paper used.  A few lines of sewing machine stitches helped to add interest to the background.


The picture was printed in black and white, so that it pops in the layout.  The title came from the sticker sheet of the collection, and just a few extra details were added to create some points of interest on the layout.


The final layout.


Finally, I added  my journal lines at the bottom of the page, trimmed the edges of the layout by half an inch;  the entire layout was then stitched to one of the patterned papers from the collection.

I really like how the final layout looks like.  You can find all the materials used at Scrapbook Nerd, so take a look at the store, there is always something new being added to its shelves.

Until next time,

Happy scrapping!


Materials Used:
Cut file - Sassy Circles - The Cut Shoppe
Patterned papers,  Puppy Love collection, Doodlebug & Baxter collection, Seven Heaven, Studio Calico
Wood veneer,  Fur Fusion - Jillibean Soup
Cardstock Stickers - Puppy Love collection, Doodlebug
Shape sprinkles - Puppy Love & Puppy Play, Doodlebug
Word Stickers - Small Chat, Tim Holtz - Ranger


Sep 28, 2016

Cool Rad Awesome Dude


Scrapbook Layout  created for Scrapbook Nerd - Cool Rad Awesome Dude -


a close up of the layout


Hello there!

I can't believe we are in September, autumn is at our heels, and my kids are both High Schoolers...  

This week is my reveal time at Scrapbook Nerd, and I  have created projects based on family, and how they are changing as we grow older.  For this layout, I used Fancy Pants's "Good Fellows" collection to document a picture of my son in his suit.   I drew inspiration from the papers to add layers and colors to the page.  Here is a small video on how this layout came together:


For this layout, I started by creating the diagonal segment where I placed my picture, and the title.  I chose to use all patterned papers from the collection, as it contains a lot of white in it.

A look at the layers  on the  layout.


Since I am using a black and white picture, I added some mixed media behind the  picture and title of the layout.   I chose to layer the photo with papers from the collection.


I like the subtle effect of the ink behind the picture layers


For the title, I chose a Scrapbook Nerd cut file (Guy Stuff - it is available for free at the store). I chose to back the empty spaces of  the cut-out with the same papers on the picture layers.  The title was attached to the layout with adhesive foam dots, to add some dimension to the project.


A close up to the title of the project.


To finish the layout, I added a few more details along the page, as well as a few lines of journal that describe how i feel about this (not-because-he-is-my-son) amazing boy.  Here  is the final layout:


I really hope you take a second look at this beautiful collection from Fancy Pants, and all the new stuff that Barb and Joy are always stocking the virtual shelves of Scrapbook Nerd store with.

As always, let me know if you have any questions about anything on this layout.

See you soon!!


Materials Used:
Cut file -  Guy Stuff  -  Scrapbook Nerd (designed by The Cut Shoppe).
Patterned Paper -  Good Fellows Collection - Fancy Pants  Designs
Puffy Stickers - Good Fellows collection - Fancy Pants Designs
Clear Stickers - Outfitters collection - Pink Paislee
Cork Heart sticker - C'est La Vie collection - Pink Paislee
Word phrase stickers - Felicity collection - Pinkfresh Studio
Rubber Shapes - Life Noted collection - Pinkfresh Studio
Shimmer watercolors - Artist Loft - Michaels


Sep 27, 2016

Best Ever


Scrapbook Layout created for Scrapbook Nerd (Silhouette Savvy Series - Stretch your Cuts)  -  Best Ever-


a close up of the layout.


Hello everyone,

For today's blog post at Scrapbook Nerd, I  am showing a small tutorial on how to use the left over pieces of a cut-out.  Here is the link to the tutorial:  http://scrapbooknerd.com/?p=4947
I am always looking for inspiration for my layouts.  After creating a cut-out for one of the previous layouts, i realized that the negative side of the cut could be used as an interesting background for a new layout.  


I used the cut out as a guide to transfer the small pieces onto watercolor paper, and started working on creating a new background for this project.  Here is a small video on how the background was put together after being transferred.


Since the background give opportunity to color and texture, I used a few color shine inks to create a mixed media effect.


The background of the layout.


Once the background was dried, I used a  paper piercing tool to create a stitching guide around the heart.

I tried to stay simple with the design, so that the background and the picture will be showcased.


A simple large title works well on this page, as a ways to balance the design.


To finish the page, I added small details around the page, and a few lines of journal  at the bottom of the heart.  Here is the final layout:


I love it (truly love it!).   For more information, on how the cuts were transfer, please visit the Scrapbook Nerd blog.  As always, let me know if you have any questions on how this page came together. 

See you tomorrow!


Materials Used
Cut file - designed by Paige Evans for Studio Calico
Watercolor paper
White card stock - American Crafts
Inks - coral, blush, mustard, cherry, gold, navy, seafoam, green, and white - Color shine collection - Heidi Swapp
Title -Thickers -Fancy Free collection -Pink Paislee
Wood Veneer - Fur Fusion collection - Jillibean Soup
Tabbies - Illutrated Faith
Word stickers - Small chat collection - Tim Holtz for Idea-ology
Stickers - Soft Spoken collection - MAMBI


Sep 26, 2016

Let's Go


Scrapbook Layout created for Scrapbook Nerd  - Let's Go -


a close up of the layout


Hello there!

I hope you all enjoyed the weekend, and are ready for a new week.

My reveal week continues at Scrapbook Nerd.  For this project, I chose to document a picture of my son inside the plane as we were about to land in Ecuador.  Since I took this picture with my phone, there was a lot of noise in the picture.  My choice was take the color away, therefore converting the picture to black and white.


the background of the layout


To start this layout, i chose  Bazzill's heavy cardstock, and used a lot of shimmer watercolor to create an inky background.  I was inspired by Shimelle's GO Now Go collection, and the beautiful cloud and plane paper.


To recreate the sky, I fussy cut  clouds from papers in both Shimelle's collections: Starshine, and Go Now Go.   I layered the clouds in the bottom left corner of the layout.   Using a paper piercing tool, I created a long curly line that started at the clouds, and run along the page to the diagonally opposite corner of the layout.  I used white embroidery thread to complete the path.


Once I finished stitching the page,  I trimmed a small edge just to the top and right edges of the mat, and stitched it to one of the papers from the Starshine collection.  I added the acetate plane (from the ephemera pack) to the end point of the stitching.


a close up to the picture details

In order not to lose the details in the background of  the page, I chose to simplify the layers behind the picture.   I chose one of the cut-apart cards from the Go Now Go collection, and using an exacto knife, cut around the image of the plane, making sure not to separate it from the card ( the end result looked like a paper corner).  I inserted the picture  in the card, and added just a few details around the page.


the final layout.


Here is the final layout (after adding the title, and the journal lines).   I like the monochromatic look of the page, and its simplicity.   I am glad that Joy and Barb at Scrapbook Nerd were so helpful at special ordering the Starshine collection for me.

Thanks for stopping by.


Keep on crafting!


Materials Used:
White cardstock - Marshmallow - Bazzill
Watercolors - Artist Loft - Michaels
Patterned papers - Starshine collection 12x12 paper pad - Shimelle
Patterned papers - Run, and Fly - Go Now Go collection - Shimelle
Ephemera. phrase stickers, wood accent buttons and word thickers - Go Now Go - Shimelle


Sep 25, 2016

My Girl


Scrapbook Layout created for Scrapbook Nerd  - My Girl -


Hello there,

This is my reveal week at Scrapbook Nerd.  This month, i was inspired by simplicity, white space, and black and white pictures, in no particular order.
For my first project, I am using the Crate Paper's Cute Girl collection (which i purchased to document my young niece, but am using in other projects, too).


The background of the layout.


The cut-out was created with a Paige Evans design for Studio Calico.   I chose to back each square with papers from the collection (using the 6x6 paper pad), and different color vellum.   


My daughter.

I chose to anchor the layout with this picture of my daughter.  I created a small cluster around the picture with pieces from the collection.


To balance the piece, I added a small cluster on the opposite side (diagonally) of the picture.  I pulled some pieces from the collection, and a few from Crate Paper's Hello Love collection.


Finally, I matted the cut-out on a paper from the collection, and added my journal lines  at the bottom of the page.

I really love the color contrast on this page, and how the picture is highlighted without much decor.   IF you wish to order all the materials used on this layout, please visit Scrapbook Nerd.  Joy and Barb will help you with any order.

Thanks for visiting my blog today.  

See you all tomorrow!


Materials Used:
Cut file designed by Paige Evans for Studio Calico
Patterned paper: 6x6 paper pad- Cute Girl collection - Crate Paper
Patterned paper -Cheery -Cute Girl collection - Crate Paper
Vellum - Hello Love collection, Cute Girl collection -Crate Paper
               White, Pink - American Crafts
Chipboard Stickers - Hello Love collection, and Cute Girl collection - Crate Paper
Puffy Stickers -  Bloom collection , and Cute Girl collection - Crate Paper
Card stock stickers - Cute Girl collection - Crate Paper.

Sep 23, 2016

Pool Beauties


Scrapbook Layout -  Pool Beauties  -


a close up of the layout.


Hello,  

I had worked this layout as soon as  the picture was taken,  but had forgot to publish it.   I love this picture of the two girls at the pool, and was inspired to go girly for this layout.


To start, I picked the Hello Hearts cut file from the Cut Shoppe to create the background for this  layout.  The last pieces from Simple Stories' Sunshine and Happiness collection were perfect to add some color to the background.  The stitching around the hearts, just helps to accent the color.


I pulled a lot of ephemera and stickers from the Sunshine and Happiness collection to create the clusters around the picture  (I am left with just bits and pieces from the collection.  I loved it that much!)


Title of the page


For the title I chose the Tall Type cut file from the Cut Shoppe,  I used white card stock to create the cut outs and backed them with vellum and pieces of paper from the collection.


To balance the design, I chose to add a small cluster of ephemera at the corner of the layout, as if peeking from behind the beautiful Fancy Pants paper.


Here is the final layout.   All the small details make it beautiful to me.   I hope you also enjoy the layout.

Please let me know if you have any questions about how this came together.

See you very soon!


Materials Used:
Cut Files -  The Cut Shoppe 


Patterned paper -background -  Millie and June collection -  Fancy Pants Designs
Patterned paper -cut outs - Sunshine and Happiness collection - Simple Stories
Stickers, ephemera - Sunshine and Happiness collection - Simple Stories
white vellum


Sep 22, 2016

Happy Pool Day


Scrapbook Layout -  Happy Pool Day -


a close up of the layout,


Hello!,

I have been busy creating new projects for the different design teams, I am part of.  However, in between assignments, I have been using the breaks to try and use up my paper stash, and document some of the pictures from the summer outings.


A look at the mixed-media on the layout's background.


I started this layout, by trying to replicate the water splash created when kids cannonball into a swimming pool.   I chose water colors like blues and teals for the background.  Once the paint was dried, I used the May Mash up ampersand cut file to add a large focal point on the layout.


a close up to the picture details


I attached the picture of my littles with a few pieces of ephemera around it.  I picked pieces that had a lot of color in the blues and fuschias to match that of the picture.  


the title of the page


For the title, i chose to play with the stickers and ephemera from Simple Stories' Sunshine and Happiness collection.   I added the title to the top left corner of the page.  To complete the page, I glued and stitched the page to a pink watercolor paper.   I made sure to trim a small edge around the entire page, so that the background paper will show as a frame to the layout.
Here is the final layout:


I like how the contrast on colors shows throughout the page, and I hope this serves as inspiration to finish documenting summer pages (though i still have at least 100 pictures to document).
 As always let me know if you have any questions about this page.

Take care!


Materials Used:
cut file - The Cut Shoppe - May Mash Up

The Cut Shoppe digital collection -Snapshots

Puffy Stickers - Atwell collection - Fancy Pants Designs
Patterned paper, card stock stickers - Simple Stories - Sunshine and Happiness collection
Background paper (mat) - Amy Tangerine -Better Together collection
Pink Vellum paper
Heidi Swapp color shine - peacock, navy, white, seafoam and teal

Sep 21, 2016

Love Life!


Scrapbook Layout created for The Cut Shoppe - Love Life! -


A quick peek at the layout.


Hello there!

Today, I am up on the Cut Shoppe's blog with this lovely layout about my littles.   I took this picture of them enjoying the rides at an indoor fair while we were babysitting them.  Their happy smiles needed to be documented, so i created a page around this picture.


A look at the background of the layout


Since the picture was taken while my littles were riding the airplane ride, I chose to use the Cut Shoppe's "Give it a Whirl" cut file to replicate the rotor at the front of the plane.  I welded a few of the images so that they created a grid.  I chose to color block the patterned papers used to back the cut file, and after stitched a small circle (matching the papers).


I printed the picture in black and white, and placed it in the center of the background.  I chose to add just a small cluster of pieces at the top corner of the picture (making sure that they matched the colors in the background).   


The title of this layout


For the title, I chose the Cut Shoppe's "Words to Live By" cut file.  I rearrange the image so that it reads horizontally, instead that vertically ( as in the original cut file). and had the Silhouette cut two  pieces out of white cardstock.  Next I created an offset to the sentence, and sent it to cut in the Silhouette, but on one of the patterned papers of the Fancy Free collection (this way the title really pops out at the viewer).  I used glue to keep the three cut-outs together.


To add interest along the page, I added pieces of ephemera, chipboard and puffy stickers, in matching colors to the the patterned paper where they were placed.   To finish this layout, I added my lines of journal below the picture.   Here is the finished layout:


I love the finished and polished look of this page, and I hope that serves as inspiration to take a look at all the cut files the Cut Shoppe has to offer on their Etsy shop.

Thanks for visiting today!.

Take care!


Materials Used:
Cut file - Give it a Whirl, and Words to Live By - The Cut Shoppe

Patterned papers - Fancy Free collection - Pink Paislee
White card stock - American Crafts
Ephemera -  Fancy Free Collection - Pink Paislee
Puffy Stickers -  Fancy Free collection - Pink Paislee
                           Life is Beautiful collection - Fancy Pants Designs
Tabbies - Illustrated Faith
Chipboard Stickers - MAMBI Chips
Word Stickers - Small Chat (Occasions)-  Tim Holtz - Idea-ology