Showing posts with label cut files. Show all posts

Jan 29, 2020

REMEMBER - JustNick Studio


Hi there!
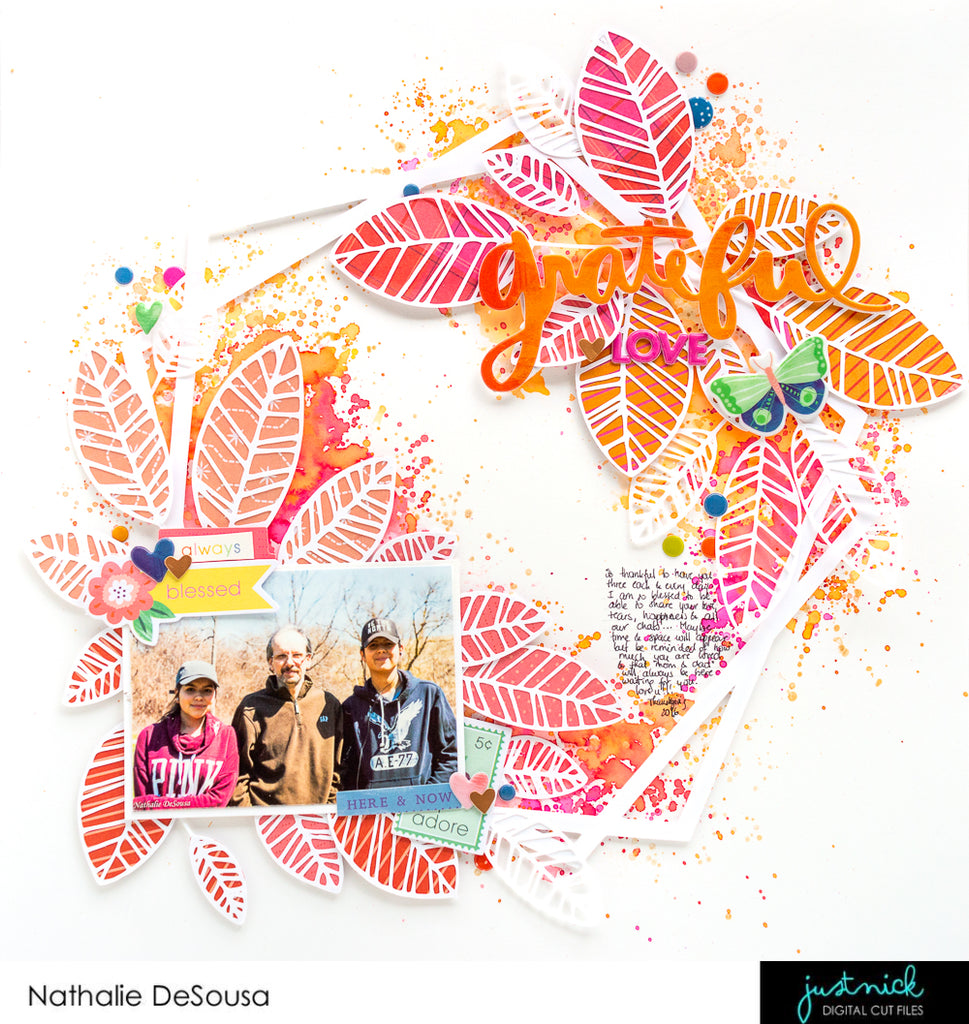
Nathalie with you today bringing you a new layout that is all about spring and new life.   My hubby and i are so blessed to be Godparents to my cousin's ( she is like a little sister to me) two daughters.  The littlest one just turned one a few days ago, so i used her birthday portrait to create this page using some of the JustNick cut files.


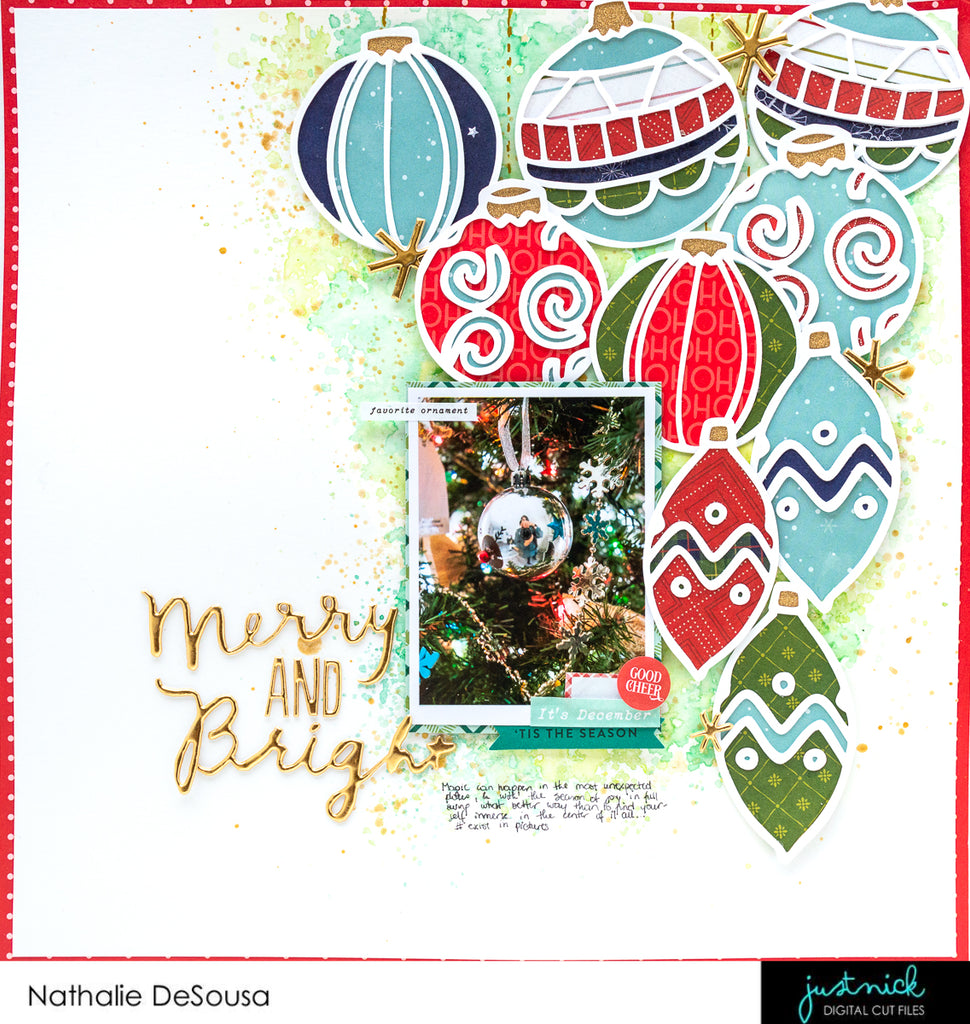
The inspiration for this page was her outfit, so i set to create a background that will make the picture pop.


I used a bit of Vicki Boutin Watercolor markers for the background and created a soft watercolor frame.  A bit of gold ink just adds pop of shimmer on the page.  Once it dried, I cut a few of the REMEMBER FLORAL cut file images from white cardstock and set them on the background.


To create the title of the page, i used the REMEMBER cut file to cut the word from white cardstock and backed the spaces with a paper from the Dear Lizzy She is Magic collection.


I set the word on the left side of the page on top of the floral die cut pieces. I used a piece of the floral cut out to add an extra accent to the left of the title.


I used the other piece of the die cut to add as a layer behind the picture.  All that was left to do was add a few embellishments throughout the page (all from the same collection).


I love how soft and vibrant the page turned out, and i hope  it inspires you to document some of your memories.  Remember to check the JustNick Studio shop for these and more beautiful cut files.

XO

Dec 10, 2019

HOME FOR THE HOLIDAYS INSPIRATION - Pinkfresh Studio


hi there!
Nathalie with you today with a bit of Home for the Holidays inspiration.  I am sure most of you are busy working on documenting your December, and since i am in the Northern hemisphere, that means Winter and snow for Christmas. So, let me show you what i have created...

Under the Mistletoe


I love the colors of the Home for the Holidays collection, and probably the Mistletoe  paper is one of my favorites ( even though i am not a yellow fan!).   But it was the perfect paper to frame the story of our fun adventures with a mistletoe head band.


I wanted a large title to offset the film strip, so i used the Kelly Alpha Die sets ( lowercase and uppercase) to create the title for the layout using papers from the Home for  the Holidays collection.  I cut the same letters from double white cardstock and backed each letter - this makes the small details in the letter die cuts stand out!-.


I backed and layered the film strip with  the Holiday Gifts and Advent  paper.   Each picture got a cluster of embellishments around it, however I chose to add a larger cluster to the left of the top picture so that it balanced the page completely.   The following  video will show you how it all came together:


Just loved how this came together using the colors and patterns from the collection and the die sets.


Though the collection  is perfect to document your Holiday/ December memories, it is so versatile that can easily be used to create memories of your Winter adventures.  Let me show you!

Winter Walk


To create this page, i pulled the cooler colors of the patterned papers and combined them with a bit of mixed media (liquid watercolors) and the Pine Bough Square cut file.


I started by creating a soft edge on the paper strips using the Essentials:  Lacey Edgers Die Set.  The edges bring texture to the page, and add the winter feel to the page.


To bring more of the winter feel to the page, I used liquid watercolors ( Sky Blue, Aquamarine, Bubble Gum, Clementine, Sunshine) to add splashes of color on the background.   Once dried, I set the paper strips in place, and used the Pine Bough Square cut outs to create a large cluster of sprigs  around the picture.  The following video will show you more details of my process:


I love how this layout shows how versatile the Home for the Holidays collection can be, all you need is a bit of Liquid watercolor and one of the  new cut files.


I hope these have inspired you to pull your Home for the Holidays collection and other Pinkfresh Studio goodies ( dies, stamps, cut files and mixed media products) to document your December/Holiday/Winter memories. 
Remember to share with us what you have created, and if you have questions on how these came together, please do not hesitate to contact me!.
Happy Holidays!

Dec 5, 2019

12 DAYS OF GIVEAWAYS, Day 4 - JustNick Studio

Hi there,
Nathalie with you today bringing Day 4 of the 12 Days of Giveaways!  I am so excited to be part of this JustNick Studio tradition - I hope you all have been checking the blog to collect your free daily cut file download-.  Today's freebie is the ORNAMENT 3 cut file, and you are going to love how fun and versatile it is!

How fun are those ornaments!  I started this page with a bit of mixed media.  I used Vicki Boutin art crayons to bring some of the green of the Christmas tree to the page.


My idea of creating a cascade of ornaments came from the fun selfie.  For this, i cut the ornaments twice from white cardstock and stacked them together to create dimension on each ornament.
To bring the festive feel of the season, i chose papers from the Pink Paislee Together for Christmas and Pebbles Inc. Merry Little Christmas collection to carefully back each of the ornaments, then attached them to the background using foam adhesive.
All that was left to do was embellish the picture with a few stickers and a shiny title.   Just love those ornaments and i think they will be perfect to document some of your December memories.  And you can download a copy of the Ornaments 3 cut file for free just today - Dec. 5th, 2019
Here is how you get your free copy of the cut file:
Enter the code: ORNAMENT3FREE at checkout to get this design for free.
This code is only valid until midnight CST on December 5th, 2019 at midnight CST.
No purchase necessary. Coupon code must be entered to receive this item for free. No refunds will be given.The design will still be available in the JustNick Store for purchase after the discount code expires.
Cannot wait to see what you create with this cut file!
XO

Nov 22, 2019

THANKFUL - JustNick Studio


Hi there!
Nathalie with you today in time to celebrate Thanksgiving with our American friends.  This time of the year always bring lots of reflection, love and gratitude, and what better way to documenting than to create a scrapbook layout using some of the JustNick Studio cut files.


Our biggest blessing are our kids.  So i wanted to make them the highlight of this page.  I started by creating the background with a bit of handstitching and using the Compressed Chevron background as a stitching guide.


I chose embroidery floss that will match the colors in the Maggie Holmes Heritage collection for the background, and watched a few Christmas movies while i finished detailing the lines.


I set the picture in place and added embellishments to create the clusters on the page.   I then used the Card Sentiments 3 cut file to  cut the "thankful"  from a piece of Vicki Boutin Foundation paper and then added a bit of shine by coloring it with Gold Glaze.


The title was attached with a bit of foam adhesive to the page, and then all was left to do was add some journal lines and embellishments to complete this page.


I hope that this has inspired you to document your gratitude using some of Just NIck Studio beautiful cut files.

Til Next time,

Nov 11, 2019

MERRY & BRIGHT - Simple Stories


Hi there Simple Stories friends!

 Nathalie with you today with a new project that brings the joy of the Christmas season to a layout.  When i saw the new  Simple Stories Say Cheese Christmas, I knew that the colorful designs and papers will be perfect to document this picture of our Goddaughter as an elf last Christmas.


I started by creating a fun title for the page. I chose an alphabet from the Silhouette store, and cut each  letter from different papers from the Say Cheese Christmas collection.  In addition, i arranged the letters in order -for the title- and created an offset around the words.  I cut this offset from white cardstock and used it as a base to handstitch the letters of the title together.


For the background of the page, i chose the Sn@p Basics Hickory/Cream grid paper .  I chose to fussy cut a few florals form the Making Spirits Bright paper and attached them around the  outer edge of the background using foam adhesive


Once the title was glued to the background, the layout came together quickly,  First i used a few of the papers to frame the picture and add layers behind it.   I tucked the picture under the title, and started to add small embellishments around it,


All the cute and festive stickers and ephemera pieces were perfect to add sentiment to this page.   Plus they are so easy to combine that it makes this page come together in just a few minutes.


I hope this has inspired you to check the new Simple Stories Say Cheese collection.  You are going to fall in love with the designs, colorful images and how versatile it can be.

Til'next time


Nov 5, 2019

BUT FIRST COFFEE - Just Nick Studio


Hello there!
Nathalie with you today with a new layout that is all about my devotion/addiction to coffee.   Every time i get a new coffee mug, i always take a selfie with it, and this new mug is probably a new favorite and large enough to hold 2 cups of coffee at once :)  .. So, just imagine how happy it made me to see the new Just Nick Studio cut files, just perfect for this page!


 I started by creating the mixed media background of this page using VIcki Boutin Art Crayons and Pinkfresh Studio Liquid watercolors. While the background dried, i started working on the title for the page.


I used the But First Coffee cut file to cut the title of the page from white cardstock.  First, i set the machine to cut the "But FIrst" part of the title four times from white cardstock so i could stack them together, and create my own dimensional alphas.


I chose to stitch the "coffee" part of the title; for this, i first added an offset to the word -on my Silhouette Studio platform-, then set the inner lines of the word as a perforated line, and then send it to cut from white cardstock.  This is an easy way to obtain a stitching guide without having to pierce the holes.  I then used some embroidery thread and Espresso Liquid Watercolor - Pinkfresh Studio - to detail the word.


To continue the circle shape of the background (mug ring marks) i cut a circle frame from white cardstock using the Infinity Hearts cut file.   I used it to frame my picture and continue the look of the background.


To embellish my page, i chose to add embellishments from Pinkfresh Studio's Office Hours collection and Citrus Twist Kits.  I made sure that the embellishments stayed within a small color palette and had a circular shape.


I hope this inspires you to check the new cut files available at JustNick Studio - if you are a coffee lover, then you must get the cut file--, there is always something for everyone.   Remember you can always contact me with any questions!

xo

Oct 24, 2019

GRATEFUL HEART - Just Nick Studio

Hi there!
Nathalie with you today bringing you a project all about those beautiful Fall colors.   I love the Fall, and all the new designs that Nicole has been adding to the JustNick  store make it so easy to bring our ideas to life.


As soon as i saw the new Geometric Frames 2 cut file, i knew that one of  them will be perfect to create a wreath for one of my pages.


I used a bit of Vicki Boutin watercolor markers to add a color to the area where the  picture and clusters would be placed.


Once i set the frame on top of the watercolor background, i pulled the new  Leaf Cluster 2  and cut a few of the clusters from white cardstock.  Some of the clusters were also backed with papers from Paige Evan's Truly Grateful collection.


I weaved the clusters of leaves so that  they read as a large cluster on the page. I even added a few extra leaves to bulk the cluster.


I added small embellishments throughout the page so that they pick up the colors of the photo and add small details throughout the page.


 I hope this has inspired  you to check the new cut files available at the JustNick Studio shop.  Remember you can contact me with any questions,
xo