May 31, 2019

YOU ARE MY LIGHT - Altenew IG HOP


Hi there!
Altenew has reached 50K followers, and they are celebrating with a large Instagram Hop, i am so excited to have been asked to create a project to share as part of the IG hop, especially with the theme being, "SAY IT WITH FLOWERS". 


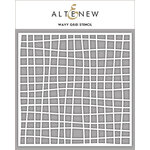
It all started with a bit of mixed media on the background. For this i used the Wavy Grid stencil, and the Altenew Embossing paste.  Once it dried,  a bit of Altenew watercolor was added to the background followed by a bit of Altenew Lagoon Metallic spray ink to finish the page.


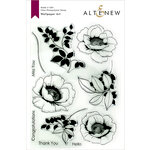
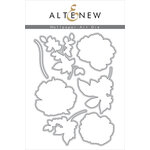
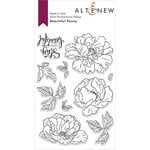
While the background dried completely, i gold embossed flowers and leaves using the Beautiful Peony and Wallpaper Art stamp and die sets.  I used some of the Altenew Watercolors to add color and dimension to each of the flowers.


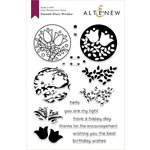
To build the title of this page, the Classic Alpha die set was used to create the letter from metallic black paper and foam adhesive.  These were glued together as in a chipboard sticker.  I used the new gold metallic inks to create the small sentiment strip using the Stained Glass Window stamp set.


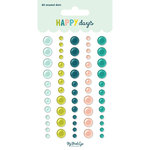
The flowers were clustered around the pictures so that they create a visual triangle with those in the title, a few extra embellishments in gold complete this page:


Stop by Instagram to join in the hop, there are lots of prizes to be won, and plenty of inspiration to admire!

XO


Materials used ( this list contains affiliate links)


Altenew - Clear Photopolymer Stamps - Wallpaper Art Altenew - Dies - Wallpaper Art Altenew - Clear Photopolymer Stamps - Beautiful Peony Altenew - Dies - Beautiful Peony Altenew - Clear Photopolymer Stamps - Stained Glass Window Altenew - Stencil - Wavy Grid Altenew - Embossing Paste

May 27, 2019

THIS DARLING - JustNick Studio


Hi there!
Nathalie with you today with a new layout that is probably one of my favorite thus far.  I love cut files, and the latest designs that Nicole has been adding to the JustNick Studio shop are just beautiful, I had to use a few of them to create this page


This page is probably the best way to describe me, "Black & White with a hint of rainbow", and  i love it.   To start, I pulled the new Blossoms cut file, and cut it twice from white cardstock.   While the Silhouette cameo worked on cutting the designs, i added a bit of black paint to the background, marking the area where the cut outs will sit.   I set this aside to dry, and went back to working on the cut out.


I used the Basic Blossoms cut file to cut the flower shapes that back the cut out.  I set the machine to cut all the flowers from a paper of the Color Fresh collection from Heidi Swapp, and also vellum.  At the same time, i set the machine to cut the new Butterfly cut file to create three butterflies for my design.


The flowers of the cut out were backed with the patterned paper flowers and vellum -for some of them-, but only the center of the flowers were glued together.  The two cut outs were then glued to the background.  I used some of the extra cut out flowers and vellum to add some dimension to the  page by adding a glue dot in between them.


All that was left to do was add the picture of my baby and some embellishments to frame the picture and bring your eye through the layout.  Of course i added some extra splatters before calling it done.


I hope this inspires you to check the new JustNick Studio cut files.  There are so many new designs available that for sure will help you create that special project.  If you have any questions please do not hesitate to contact me!

XO

CHOOSE HAPPY - Scrapbook Nerd


Hi there!
It is the last week of May!! so one more project for Scrapbook Nerd before the month is over.   I chose a picture of my daughter on one of our vacations to create this page.


To create the background of the page, i started with cut file from Handipaper, and  decided to shrink it so that it formed tiles instead of a large frame.  I cut this  four times from white cardstock and then backed each of the images with papers from the Happy Day collection from My Mind's Eye.


I played a bit with the formation of the titles on the page, and decided to go for a stacked look with some of the edges running of the page.  Once i glued the frames to the background, a bit of foam adhesive was added  behind some of the flowers to create dimension on the background.


i backed and layered some of the collection papers behind the picture, and set it in the center of the page.  I used the negative space created by the frames to add my title (Heidi Swapp's Emerson Lane collection),and then added a few more embellishments to each of the frames in a color blocking manner.  A few lines of journal and gold ink splatters complete this page:


Love how this turned out, and how the background brings movement and color to the page.  Remember to check all the products used at Scrapbook Nerd, there is so many new products arriving.  IF you have questions on how this came together, please do not hesitate to contact me!

XO


Materials Used ( the list contains affliliate links )

My Mind's Eye - Happy Days Collection - 6 x 6 Paper Pad My Mind's Eye - Happy Days Collection - Decorative Brads My Mind's Eye - Happy Days Collection - Chipboard Stickers My Mind's Eye - Happy Days Collection - Enamel Dots My Mind's Eye - Happy Days Collection - Cardstock Stickers My Mind's Eye - Happy Days Collection - Mixed Bag - Die Cut Cardstock Pieces Heidi Swapp - Emerson Lane Collection - Cardstock Stickers with Foil Accents

May 26, 2019

THINGS CHANGE - Technique Tuesday


Hi there!

I have been having fun with this month's releases from Technique Tuesday -as i am one of their guest designers for May-.   This time i chose to work with the beautiful Layered Butterfly Crafting Die, Beautiful Butterflies Crafting Die and Beautiful Butterflies stamp set to create a new layout on my Family album -Life Crafted Album from Citrus Twist Kits-


 I started by cutting papers from My Mind's Eye Gingham Farm collection to fit the page.   Then used the 6x6 paper pad Flower Market collection from Carta Bella to back the picture and cut some of the butterflies using the Beautiful Butterflies Crafting Die.  I also cut a few of the butterflies out of vellum, these were layered together and added to the bottom of the picture along with embellishments from the Gingham Farms collection.


Next i created a few butterfly silhouettes using the Layered Butterfly Crafting Die from vellum and papers from both collections being used.   One of the butterflies was added to the top right corner of the picture along with some embellishments.


The other butterfly was then used to help create the embellishment cluster on the title of this spread.  For this, i cut a label using the Essential Stitched Labels Dies and then stamped a sentiment from the   Beautiful Butterflies Stamp Set.    These were layered on a picture frame (Gingham Farm collection) at the bottom of the page.  Here is the final layout:


I love how this turned out, the colors and simplicity of the page are perfect to document my nieces first day on social media.  You can check the stamps and dies used in this page at Technique Tuesday. If you have questions on how this came together, please do not hesitate to contact me!

XO


Materials Used   (the images contain affiliate links)


Carta Bella Paper - Flower Market Collection - 12 x 12 Paper Pad Carta Bella Paper - Flower Market Collection - 6 x 6 Paper Pad Carta Bella Paper - Flower Market Collection - Decorative Brads My Minds Eye - Gingham Farm Collection - 12 x 12 Double Sided Paper - Madi My Minds Eye - Gingham Farm Collection - 12 x 12 Collection Pack My Minds Eye - Gingham Farm Collection - Decorative Brads My Minds Eye - Gingham Farm Collection - Enamel Dots My Minds Eye - Gingham Farm Collection - Mixed Bag - Die Cut Cardstock Pieces My Minds Eye - Gingham Farm Collection - Cardstock Stickers Technique Tuesday - Memory Keepers Studio - Clear Photopolymer Stamps - Beautiful Butterflies Technique Tuesday - DIY Steel Die - Beautiful Butterflies Technique Tuesday - Fresh Cut Studio - DIY Steel Die - Layered Butterfly Technique Tuesday - DIY Steel Die - Essential Stitched Labels