Showing posts with label mixed media scrapbooking. Show all posts

Aug 1, 2020

Altenew Build-A-Flower: Balloon Flower Release Blog Hop + Giveaway


Hello there!
Welcome to the Altenew Build-a-Flower: Balloon Flower Release Blog Hop + Giveaway.  You are arriving from my friend - and amazing designer- Jaycee's blog.


Today, Altenew is releasing a new member in the Build-a-Flower stamp set.  Welcome Balloon Flower!  this new stamp and die set is beautiful and easy to build.  The size of the bloom is perfect for all types of papercrafting projects, but i chose a scrapbook  layout for it


I started by adding a bit of mixed media to the background using the Altenew Watercolor pan set!   While the background set, i stamped the images..


I used Shades of Purple and Rose Petal mini ink cube set to stamp the florals, and Tropical Forest mini ink cube set for the leaves.   


I backed the pictures of my little ones with papers from the Celebrate collection, and then create a column of florals and pieces of the Creative Cut outs:Wreath .  


To finish the page, I used the Handwritten Hello Die set to cut part of the title of the page, and then completed the page with a few more embellishments and stickers.


I love how this turned out, and i cannot wait to see what you create with this new stamp set.   Remember that you can always receive the Build a Flower stamp at home using the subscription program...


Of course this celebration will not be complete without a giveaway:

To celebrate this release, Altenew is giving away a $30 gift certificate to 5 lucky winners! Please leave a comment on the Altenew Card Blog for a chance to win. 


We’ll also draw a winner to receive a $15 gift certificate from the comments left on each designer’s blog on the blog hop list below. All winners will be announced on the Altenew Winners Page on 08/09/2020.


Good luck everyone!


I believe this is the last stop of this blog hop, however if you missed any stop, please return to the Altenew Card Blog to start the hop. Here is a list of all the participants for your convenience:


Altenew Card Blog

Laurie Willison

Nicole Watt

Virginia Lu

Jaycee Gaspar

Nathalie DeSousa <<<YOU ARE HERE


Thanks for stopping by!

Dec 9, 2019

CAPTURED - Freckled Fawn


Hi there!
It is that time of the year when everything is so busy and colorful, but my little heart always goes back to black and white (my favorite color combo ever), so when i got this month's Freckled Fawn kit, i think i squealed a bit!


My first choice is always mixed media, large titles and handstitching... So i played with my Vicki Boutin Art Crayons and create an ombre background for my page.   While that set,  i used my Cameo to cut the title from one of the papers and handstiched the letter using matching thread to the one on the background.


I wished the kit came with a collection of these wooden frames.  I wrapped some embroidery thread (coordinating color) around the edges of the frame and glued a picture of our baby behind it. 


The chipboard stickers in the kit are fabulous, so i used a few of them to frame the picture.  I added a few of the past kits god enamel dots so it helps to warm up the page a bit.  Then added my journal line about our beautiful boy under the picture.


To complete the page,  i added two clusters of labels , washi tape and enamel dots at diagonally opposite sides of the page to help balance the page and create a focal point in our page.


Just love how this turned out, and how fun it was to put together.  I am so in love with the Freckled Fawn 6x8 December kit that i am thinking about purchasing a new one!!  remember to check it out.

As always please contact me with any questions about this page!

XO

Jul 23, 2019

COSTUME THRILLS - Simple Stories


Hi there Simple Stories friends!
Nathalie with you today bringing you a new layout  boo-ti-ful layout.   When the new Happy Hunting collection arrived at my doorstep, all i could think about was documenting a few of our past Halloween memories with its beautiful color palette and designs.  


It all started with creating the background for this layout.  I chose to add some mixed media to a letter size white cardstock page so that it complemented the warm tones in the collection.  While the background dried, i used a JustNick cut file  to cut two spider webs from the Jeepers Creepers paper.


The Hocus Pocus paper is probably one of my favorite papers in the Happy Haunting collection, so  used it as the mat for this layout.  I glued the cardstock and spiderweb cut outs towards the top part of the paper.  


Once the picture was set in place ( i used papers from the collection to back and add layers behind the picture), i used some of the ephemera pieces to create the title for this layout,  just loved the little spiders that the collection features.


To use all the space below the picture, i chose to add a large cluster of bits and bit and pieces, stickers, and a few stamped sentiments (using the coordinating stamp set).   I love florals, so having them to embellish the page was amazing.  The lines of journal were also added at the bottom of the cluster, followed by splatters of white, black and gold ink.


I love how this page turned out.   All those beautiful embellishments just complemented the story of my daughter's Halloween costume search.   You have to check the Happy Hunting collection from Simple Stories, i am sure you will love it, too!


Apr 22, 2019

HEY AMAZING YOU! - JustNick Studio


Hi there!
Nathalie with you today bringing you a new project that fits this week's theme, Flowers.   There are so many new beautiful cut files available in the JustNick Studio shop, so, I picked a few of them to create this fresh flowery page.


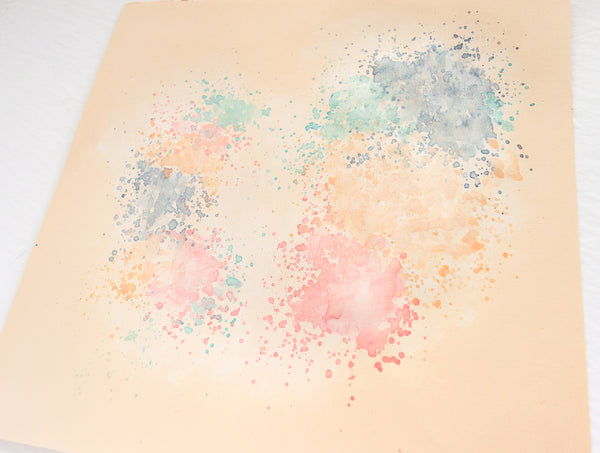
I started this page by adding a bit of mixed media to the background using acrylic white paint and Distress inks.  While the background dried, i cut from white cardstock the Henna Heart cut file as well as a few stems using the Stems 2 cut file.


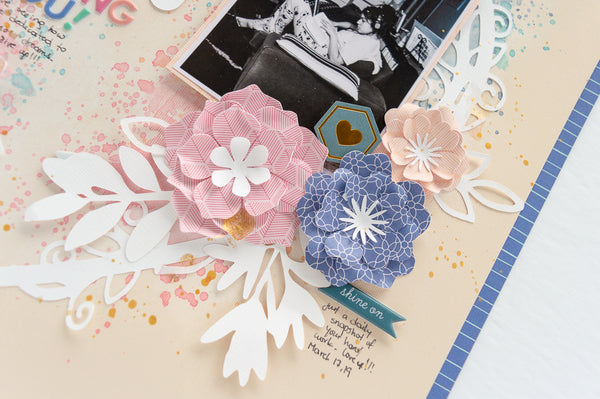
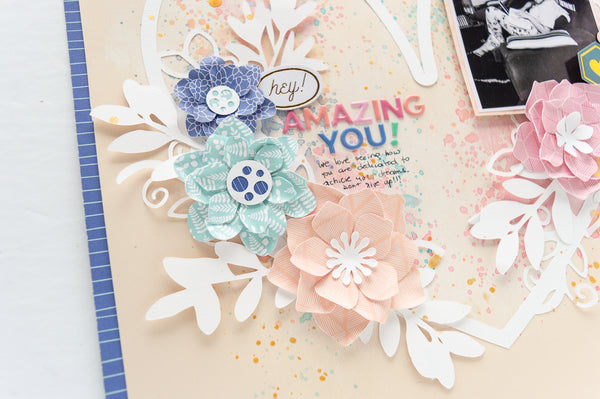
Once the background dried, the heart cut out was glued to the page. I pulled Pinkfresh Studio's Joyful Day collection to create the flowers using the Build a Flower 3, Build a Flower 4, Build a Flower 6, and Build a Flower 7 cut files.


I ruffled the edges of the flowers using a bone folder and then build them together.  I replace the flowers in the heart cut out with these flowers, and added the  stems behind them so that they create clusters around the page.


A few embellishments from the Joyful Day collection complete the clusters and title in the page.  A few lines of journal and gold ink droplets are the final touches added.


I hope this has inspired you to mix a few of the JustNick Studio designs in your next project.  Nicole has added lots of beautiful designs to the store lately, it is hard to just choose one.
Remember you can always contact me if you have questions on how this came together.

XO

SUMMER VIBES - Citrus Twist Kits

Hi there!

Nathalie with you today with a new scrapbook layout.   I don't know  about you, but this month's kits and stamps are so versatile that all it took was a bit of mixed media to pull this page together:


I picked the new Maggie Holmes - Sunny Days - Acrylic paint set from the CTK shop cause i knew they would easily combined with all the papers from this month's kits.  For this page, i used the blue and teal paint to create the background of the page.


Once the background dried, i used an edge punch (Scallop lace from EK Tools) to create two strips of paper from the Add-on kit.  Since my daughter is wearing blue in the picture, i chose to use colors that match those tones.   Once the strips were stitched to the page, it was all about layering papers from the Make It a Venti and add on behind the picture.


To soften the blue tones of the page, i chose to bring a little bit of pink details in the fussy cut flowers and butterflies (add on kit).  Then used embellishments from the Add on Kit and cut apart elements to create clusters around the picture.


To finish the page, i combined stickers from the add on kit and the Make it A Venti Alphas as well as some stamping using blue ink and this month's Add on Stamp.  The following video will show you how it all came together.


Though the mixed media is just peaking from behind all the layers of paper and embellishments, i love how it sets the mood for the page.   Remember you can always contact me if you have questions, and stop by the Citrus Twist Kits shop to check the kits and all the coordinating goodies that arrive each month.

XO


Mar 16, 2019

This Photo - VICKI BOUTIN DT


Hi there!
Nathalie with you today wrapping up this week with another project inspired on this month's mood board.     I love VIcki's new release, everything is just so versatile, and since we are on school break for March Break, time has been spent with my daughter, niece and nephew, having those new pre made mixed media backgrounds was amazing!, so let me show you what i created:

VB_THIS PHOTO_Nathalie DeSousa

This layout was totally inspired on this month's mood board (available here and at the Vicki Boutin Mixed Media community on Facebook )
New Phototastic Collage

The images of the mood board gave me so many ideas, but i was in love with those glitter stars that i had to make them the focus of this post.   For that I used the new Iridiscent Glitter Glaze and some of the fine silver glitter from Vicki's Mixology collection, and played with a few ideas on how to add the mix to a foundation paper.  Below is a picture of the results of the different ideas i had in mind for the stars.

VB_THIS PHOTO_Nathalie DeSousa-8


The glaze and glitter mixture brings lots of shine to play foundation paper; whenever added on top of a watercolored paper, it lightens the application area,thus creating a bleached-like effect on the page; and when the watercolor is mixed in the glaze, the results are a glittery paste of uniform color, but with a very luminescent finish on the color, thus making it a few shades lighter.

VB_THIS PHOTO_Nathalie DeSousa-5

The clear glaze mixture was added to a foundation paper and set aside to dry,  the  drying process is a long one due to the application and formulation of the glaze.  Once it was completely dried, i used a set of star dies (Maya Road) to cut the paper.   Once again the  glitter glaze makes it a bit harder to cut the paper,  so i had run the paper and die a few times through my die cutting machine.

VB_THIS PHOTO_Nathalie DeSousa-7
To bring the dark edges to the stars, i used a stencil brush and a bit of art crayon around the edges.  Now for the mat of this page, i pulled the new Pre-made Mixed Media backgrounds, and chose the large circle (as it reminded  me of the rainbow in the mood board), and layered the glitter stars and paper stars to form a crescent moon on the right of the page where i could nestle my picture.

VB_THIS PHOTO_Nathalie DeSousa-6

For the title of the this page, I took advantage of the puffy word stickers and a few of the glitter stars to create a cluster where i can add my title and balance the layout.   A few embellishments were added  - i kept to a black and white scheme for these- and then to finish i added a few splatters of black art crayon.  Just love how this turned out, and have prepared a video that shows you how it all came together:


I wished that you all could appreciate how shiny the stars really are, though i tried a few different angles, it is hard to capture it all in the camera. 

VB_THIS PHOTO_Nathalie DeSousa-2

And now it is your time to be inspired by the mood board to create a project of your own.  Remember to share with us your finished projects and do not hesitate to contact us if you have questions on how our projects come together.

XO

VB signature


Jan 7, 2019

Beautiful Girls


Scrapbook Layout created for Vicki Boutin DT  - BEAUTIFUL GIRLS -


VB_BEAUTIFUL GIRLS_Nathalie DeSousa


Hi there!

Nathalie with you today with a new project using Vicki's products.   We are used to adding mixed media to create backgrounds for our pictures, however  this time around i used a bit of Vicki's Magic to create patterned paper to back a cutout.

VB_BEAUTIFUL GIRLS_Nathalie DeSousa-2

To create the paper that backs the cut out, i started with a gessoed foundation paper, and then used diluted art crayons and a mister bottle to add color to the paper.   The color combination was chosen to bring the color of the jacket my niece is wearing. 

VB_BEAUTIFUL GIRLS_Nathalie DeSousa_close ups-2

Once the watercolor was dried, the flower impression was created using gesso, a stencil brush and the flower stencil from the All The Good Things collection.   The secret to create the soft impression without texture is to spread a bit of the gesso on a mat using a palette knife, and then pick a bit of it with the stencil brush, and then use it to create the flower impression through a stencil.

VB_BEAUTIFUL GIRLS_Nathalie DeSousa-3

While the background dried, the cut out was created by tracing with a pencil a piece of a heart at the edge of the cardstock.  Once the shape is cut, a bit of hand stitching was added -this is  an optional step, that can be omitted or replaced with machine stitching).  Then the piece was glued to the mixed media patterned paper created; a bit of fun foam helps to avoid having the page dip  due to the dimension added with the stitching.

VB_BEAUTIFUL GIRLS_Nathalie DeSousa-4

To mimic the patterned paper, two clusters were created at diagonal points of the picture.  Here i combined ephemera pieces, chipboard stickers, clear  and watercolor stickers. Gotta love all the flowers die cuts from the Field Notes collection.

VB_BEAUTIFUL GIRLS_Nathalie DeSousa_close ups


The title for this page was placed  inside the cut out using a combination of puffy word stickers and chipboard alpha.   A few drops of diluted gold glaze, enamel dots and a few lines of journal complete this page.    I have created a  video showing you how this all came together, enjoy!:


I hope this inspires you to check Vicki's products and to use them in your next project.  Remember you can always contact me if you have questions on how this all came together.
Have a great weekend!

VB signature