Showing posts with label Silhouette Cameo. Show all posts

Jan 29, 2020

REMEMBER - JustNick Studio


Hi there!
Nathalie with you today bringing you a new layout that is all about spring and new life.   My hubby and i are so blessed to be Godparents to my cousin's ( she is like a little sister to me) two daughters.  The littlest one just turned one a few days ago, so i used her birthday portrait to create this page using some of the JustNick cut files.


The inspiration for this page was her outfit, so i set to create a background that will make the picture pop.


I used a bit of Vicki Boutin Watercolor markers for the background and created a soft watercolor frame.  A bit of gold ink just adds pop of shimmer on the page.  Once it dried, I cut a few of the REMEMBER FLORAL cut file images from white cardstock and set them on the background.


To create the title of the page, i used the REMEMBER cut file to cut the word from white cardstock and backed the spaces with a paper from the Dear Lizzy She is Magic collection.


I set the word on the left side of the page on top of the floral die cut pieces. I used a piece of the floral cut out to add an extra accent to the left of the title.


I used the other piece of the die cut to add as a layer behind the picture.  All that was left to do was add a few embellishments throughout the page (all from the same collection).


I love how soft and vibrant the page turned out, and i hope  it inspires you to document some of your memories.  Remember to check the JustNick Studio shop for these and more beautiful cut files.

XO

Oct 4, 2019

OUR STORY - JustNick Studio


Hi there!
Nathalie with you today with a new project that is all about my family.  Once in a while  I like to create covers for my albums, and the newest word cut files from JustNick studio were perfect to create a new cover.


I wanted to frame the cover page, so i used the Floral Corner cut file to create the floral frame for the page.  I copy and rotated the file so that i had a piece on each corner and weld them all together. 


I cut the frame out of smooth white cardstock and attached it to the background using a bit of foam adhesive so that it gives dimension to the page.


To create the title of the page i used the Story cut file to create the "Our Story" cut out from white cardstock.  Each letter was then backed with papers from the new Pebbles' This is Family collection.


Once i set the title on the page, i added a picture of my family and added a few clusters of ephemera and stickers around the title and picture.  To finish the page, i cut two of the smaller images from the Beautiful Butterflies cut file, glue them together and pop them at the bottom of the page.


I love how this project turned out, and it was so easy to put together using the beautiful Just Nick Studio cut files; so make sure to check them all out.  Remember to contact me with any questions on how this came together.


Aug 23, 2019

LIFE CURRENTLY - JustNick Studio


Hi there!
Nathalie here with a new project for JustNick Studio.   I don't know about you, but time is flying by and i see how it is making my babies turn into young adults.  With so many changes, it is always good to document the good and bad days, so i chose a few of the store's cut files to create this page.


It all started with a bit of mixed media, black acrylic paint to be more exact on the background of the page.   While that dried, i used the  Floral Swag 2 to cut two large images from white cardstock.


I used papers from the Spoonful of Soul collection from Jillibean soup to back and  layer behind the picture. This was then nestled between the two floral images.


The cut outs mark the location of the photo, so embellishing was easy.   Just a few stickers, and enamel dots were necessary.   


To create the title for this page, i combined the Hashtags 1 cut file with the Here and Now cut file.  I chose cut the word "currently' from white cardstock, and the "life" word from the packaging of this collection  a few times.  These were stacked together, and then glued to the bottom left corner of the picture.


I love how this turned out, and how easy it was to put together using the JustNick studio cut files.  Make sure you check the designs used here, and all the new designs added weekly.  If you have questions on how this came together, please do not hesitate to contact me,
xo


Materials Used (images contain Affiliate Links)


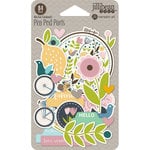
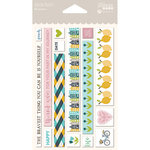
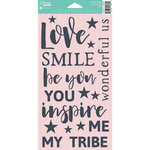
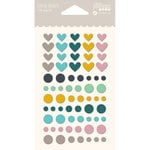
Jillibean Soup - Spoonful of Soul Collection - 12 x 12 Double Sided Paper - Free Spirit Jillibean Soup - Spoonful of Soul Collection - 12 x 12 Double Sided Paper - Be Fearless Jillibean Soup - Spoonful of Soul Collection - 12 x 12 Double Sided Paper - Bite Size Bits Jillibean Soup - Spoonful of Soul Collection - Cardstock Stickers Jillibean Soup - Spoonful of Soul Collection - Pea Pod Parts - Die Cut Cardstock Pieces Jillibean Soup - Spoonful of Soul Collection - Washi Sheets Jillibean Soup - Spoonful of Soul Collection - Foam Stickers Jillibean Soup - Spoonful of Soul Collection - Epoxy Stickers Jillibean Soup - Spoonful of Soul Collection - 12 x 12 Collection Pack Ranger Ink - Dina Wakley Media - Heavy Body Acrylic Paint - Black - 1 Ounce

May 27, 2019

THIS DARLING - JustNick Studio


Hi there!
Nathalie with you today with a new layout that is probably one of my favorite thus far.  I love cut files, and the latest designs that Nicole has been adding to the JustNick Studio shop are just beautiful, I had to use a few of them to create this page


This page is probably the best way to describe me, "Black & White with a hint of rainbow", and  i love it.   To start, I pulled the new Blossoms cut file, and cut it twice from white cardstock.   While the Silhouette cameo worked on cutting the designs, i added a bit of black paint to the background, marking the area where the cut outs will sit.   I set this aside to dry, and went back to working on the cut out.


I used the Basic Blossoms cut file to cut the flower shapes that back the cut out.  I set the machine to cut all the flowers from a paper of the Color Fresh collection from Heidi Swapp, and also vellum.  At the same time, i set the machine to cut the new Butterfly cut file to create three butterflies for my design.


The flowers of the cut out were backed with the patterned paper flowers and vellum -for some of them-, but only the center of the flowers were glued together.  The two cut outs were then glued to the background.  I used some of the extra cut out flowers and vellum to add some dimension to the  page by adding a glue dot in between them.


All that was left to do was add the picture of my baby and some embellishments to frame the picture and bring your eye through the layout.  Of course i added some extra splatters before calling it done.


I hope this inspires you to check the new JustNick Studio cut files.  There are so many new designs available that for sure will help you create that special project.  If you have any questions please do not hesitate to contact me!

XO
CHOOSE HAPPY - Scrapbook Nerd


Hi there!
It is the last week of May!! so one more project for Scrapbook Nerd before the month is over.   I chose a picture of my daughter on one of our vacations to create this page.


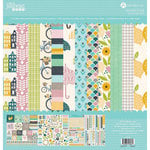
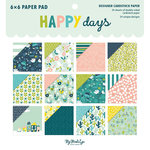
To create the background of the page, i started with cut file from Handipaper, and  decided to shrink it so that it formed tiles instead of a large frame.  I cut this  four times from white cardstock and then backed each of the images with papers from the Happy Day collection from My Mind's Eye.


I played a bit with the formation of the titles on the page, and decided to go for a stacked look with some of the edges running of the page.  Once i glued the frames to the background, a bit of foam adhesive was added  behind some of the flowers to create dimension on the background.


i backed and layered some of the collection papers behind the picture, and set it in the center of the page.  I used the negative space created by the frames to add my title (Heidi Swapp's Emerson Lane collection),and then added a few more embellishments to each of the frames in a color blocking manner.  A few lines of journal and gold ink splatters complete this page:


Love how this turned out, and how the background brings movement and color to the page.  Remember to check all the products used at Scrapbook Nerd, there is so many new products arriving.  IF you have questions on how this came together, please do not hesitate to contact me!

XO


Materials Used ( the list contains affliliate links )

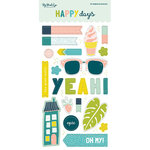
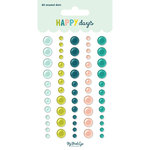
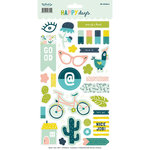
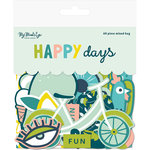
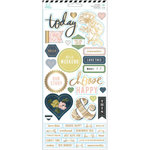
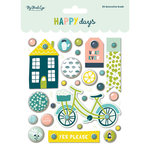
My Mind's Eye - Happy Days Collection - 6 x 6 Paper Pad My Mind's Eye - Happy Days Collection - Decorative Brads My Mind's Eye - Happy Days Collection - Chipboard Stickers My Mind's Eye - Happy Days Collection - Enamel Dots My Mind's Eye - Happy Days Collection - Cardstock Stickers My Mind's Eye - Happy Days Collection - Mixed Bag - Die Cut Cardstock Pieces Heidi Swapp - Emerson Lane Collection - Cardstock Stickers with Foil Accents

Apr 11, 2019

SPRING _JustNIck Studio

Hi there!
Nathalie with you today, and  it has been a long and cold winter here in Canada,and Spring is slowly showing up.  So, instead of waiting around for Spring to finally catch up, i decided to pull a few memories from last year's season to create this page using a few of  the beautiful JustNick Studio cut files.


I wanted something really light and airy for this layout, so i started with the Type It Alpha cut file to create the large vertical title.  I welded the letters together, and cut them out of white cardstock. 


To back the title, i chose to use the negative part of the cut out, and vellum for every other letter.   A bit of foam adhesive helps to create the dimension on the letters, and make them stand out.

 Once the background was set on the background, i laid the picture in place,and used the new Rolled Flower 1, Rolled Flower 2, and Rolled Flower 3  cut files and papers from the new Scrapbook and Cards Today Magazine Spring Fling kit to create the flowers for this page.


I used a ball tool to curl the edges of the flowers a bit, and then used a pencil to help me start the rolling process for this flowers, and then took out the pencil and continue rolling them together.  A bit of hot glue at the center of the flower holds the rolled flower together.  I added a matching enamel dot to the center of the flower to hide the hot glue.


 I glued the flowers around the picture and title of this page, but added a few leaves made from the Stems cut file from white cardstock.   A few extra embellishments -all from the SCT Spring Fling kit- complete this page.


I hope this inspires you to jumpstart your Spring documenting.  There are so many new cut files in the JustNick Studio shop that will help you bring a bit of Spring to your projects. 

XO,