Showing posts with label Handipaper. Show all posts

Mar 27, 2021

JUST MARRIED - Simple Stories


Hello there!

Nathalie with you today to share a bit of inspiration featuring the gorgeous HAPPILY EVER AFTER collection from Simple Stories.   Weddings are some of the most joyous occasions, especially when shared with your loved ones.  A few years ago, we traveled to my native Ecuador to the attend my cousin's wedding. We loved being part of the celebration, and I am so glad, the new collection arrived, so I can finally start documenting the grand day and vacation.


I started with a cut file from Handipaper.  This was cut twice from white cardstock, and I backed it with papers from the 6x8 paper pad.   


To build the page, I trimmed the Now and Forever paper to 11x11inches.  I created a scalloped border at the opposite side of the floral border.   In addition, I trimmed a 12"x3" strip from  We Do! paper, and used the same punch to create a border.  These two were layered so that the scallops meet at half point, giving the edge movement.  These were glued to the b-side of the 2x2  2x4 elements.


The cut outs were set as a cascade from the top left corner of the page.   Love how the brads bring a pop of shine to the page -as the centers of the florals-.   I kept  the layers behind the picture simple, just framing the photo with a 6x4 card, and adding a few embellishments from the collection.


The large gold foiled foam word stickers are perfect to create titles for your projects.  I simply added a few more embellishments around the title to complete the page.


I cannot wait to continue working on bringing the rest of the memories to live using the gorgeous new Simple Stories HAPPILY EVER AFTER collection. Make sure you check it out!

XO


Materials Used:

HAPPILY EVER  AFTER collection kit

HAPPILY EVER AFTER foam Stickers

HAPPILY EVER AFTER Brads

HAPPILY EVER AFTER 6x8 paper pad

Dec 18, 2019

WINTER LOVE - Scrapbook Nerd


Hi there!
It is so close to Christmas already and everything is festive around here.  However, today my good friends over at ScrapbookNerd sent me a box filled with beautiful products.  I had to use them, cause this new collection, Winter Joys from Studio Light is just gorgeous and i couldn't let it sit in my files.


I started this page by running Heidi Swapp Shimmer paste through a Kaiserkraft stencil onto a 12x12 paper from the collection. I covered the area where the title and picture where going to sit and set it aside to dry.


While the background dried, i used my Cameo to cut the this digital cut file -from Handipaper- from white cardstock, and  backed each of the empty areas using the 6x6 paper packs.


I love cool colors, so this collection is probably one of those i will have to stash on my favorites.  So i decided to cut extra flowers and greenery (using the same cut file) so that i could embellish the layout with these cut outs.


I placed the title and picture on a T design on the page, and added the extra die cuts in a zig zag formation across the title and picture, thus forming my visual triangle.


I used embellishments from Pinkfresh Studio - December Days collection-, Carta Bella - Snow Day collection- and the Winter Joys collection to build up the cluster then added small gold puffy stickers along the clusters.  Here is the finished layout:


I love how this turned out ( i love this picture of my son and i a couple years ago) and how much i love this collection, make sure to check it out at the Scrapbook Nerd shop.

As always, please do not hesitate to contact me with any questions.

Have a  Happy Holidays!

Nathalie

Dec 2, 2019

BELIEVE - Simple Stories


Hi there!  Nathalie with you today to share with you a new layout about documenting the Magic of Christmas using the beautiful Country Christmas.   I love the vintage, classic designs of this collection, and  it was perfect to bring the sentiment of the season to this page.


I wanted to showcase the papers in this collection, so i started by trimming  and distressing the edges of the O Christmas Tree paper, and adhere to the b-side of the Glad Tidings paper.   The color combination of these papers makes the page so festive.


To make the papers shine, i chose a simple design for the page.  First, one of the papers from the 6x8 paper pad was glued to the background ( i picked the paper to match the Glad Tidings paper).  To bring the snow details in the background, i used a cut file from Handipaper to create the snowflake cut out, and then attached it along the left side of the 6x8 paper.


The Sn@p cards are perfect to create layers, and i used one of the 4x6 and 3x4 ones behind the picture.  Then used  the Simple Basic paper pack to create a small pocket that is also layered behind the picture.  Once i attached this to the page, i used a few embellishments from the collection to bring color and fun to the page.


To finish the page, I used the large "Believe" sticker from the combo sheet and  then a small chipboard stickers.   I  chose to handwrite my journal, but finished the paragraph with a few stamped images from the coordinating stamp set.


I love how this turned out, a simple page made perfect by all the papers and embellishments from the beautiful COUNTRY CHRISTMAS collection.   Remember to check the collection, you will love how it can easily bring the magic of Christmas to your pages.

XO


Oct 8, 2019

CHRISTMAS CHEER - Simple Stories


Hi there!

Nathalie with you today with a new layout that is all about those magical Christmas days.  I wanted to use the new Holly Jolly collection to document this happy memory of my nephew enjoying Christmas carols.   This new collection is just amazing, the colors, designs were ideal to document this happy memory.


My idea was to bring a colorful background that will use the beautiful designs of the collection, so i picked a cut file from Handipaper to create a cluster of Christmas trees on the page.


To add dimension to the page, i cut the trees three times from white cardstock and stacked them together, then backed each one of the trees with the beautiful papers from the collection.  I just love the colors and designs in the papers.


The papers in the  Simple Basics Kit are perfect to create backgrounds, so i picked the soft Blush/Dots serve as the frame for my page.   Once, i glued the trees to the page, i used the Journaling Bits and Pieces to add the stars at the top of the tallest trees.


  Then backed the picture with the Home for the Holidays paper , nestled it in the background, and then added a cluster of stickers to  frame the picture.


To create the title of the page, first i added an extra Christmas tree (to help frame the title) and then used the alphas on the sticker tablet and a piece of ephemera to complete the title of the layout.


I created a small cluster of embellishments using stickers from the Sticker tablet and sticker combo sheet as well as ephemera from the journal bits and pieces.   To finish the page, i added a few lines of journal and enamel dots.


The new Simple Stories Holly Jolly collection is so beautiful and filled with amazing designs that it makes is so easy to document your memories.  Be sure to check it out.  You are going to love this new collection.


Oct 7, 2019

GOLDEN MAGIC - Scrapbook Nerd


hi there!

It is time for some Fall inspiration for Scrapbook Nerd.   I love the Fall, especially its colors, so i chose the new Truly Grateful collection from Pink Paislee to document a fun trip to the pumpkin patch last year.


It all started with two cut files from Handipaper.   I cut them from white cardstock and backed them using papers from the collection, making sure that i added a bit of blue to the pumpkins as that is the color i want to emphasize in this layout.


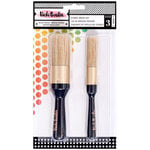
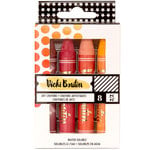
Since i was short on time, i used a premade mixed media background using VIcki Boutin's paper pad, but added a few extra details using a Carta Bella stencil, art crayons and a stencil brush.


The picture was backed and layered with papers from the collection, and then attached to the background with foam adhesive, nestled between the pumpkin cut outs.   A few clusters of ephemera were added in between the pumpkins.    Then the title was added using a combination of puffy word stickers.


To extend the design, a butterfly was fussy cut from the ephemera pack and glued to the top of the page.  I hand stitched the trail using some white thread.   A few lines of journal complete the page.


I love how this turned out!  Color always does it for me.  The following video will give you a more in depth look at how it came together:


As always, please do not hesitate to contact me with any questions, an check Scrapbook Nerd for all the materials used in this page.


XO


Materials used:


Pink Paislee - Truly Grateful Collection - 12 x 12 Paper Pad Pink Paislee - Truly Grateful Collection - Thickers - Phrase - Puffy Pink Paislee - Truly Grateful Collection - Puffy Word Stickers with Matte Copper Foil Accents Pink Paislee - Truly Grateful Collection - Ephemera Pack with Matte Copper Foil Accents Pink Paislee - Truly Grateful Collection - Ephemera Pack - Floral American Crafts - Color Kaleidoscope Collection - 12 x 12 Paper Pad - Mixed Media American Crafts - All The Good Things Collection - Stencil Brush Set American Crafts - All The Good Things Collection - Mediums - Art Crayons - Set 1 - Warm Carta Bella Paper - Fall Break Collection - 6 x 6 Stencil - Autumn Leaves

Sep 23, 2019

THE 2 OF YOU - Scrapbook Nerd


Hi there!

It is time for our monthly Sketch Challenge over at Scrapbook Nerd, and this month's sketch is a playful and simple one that will make you pull scraps of different patterned papers to construct your page.


I love the quilted look on the background of the page, so i chose to stay close to the sketch when creating my page, and decided to use the Spoonful of Soul collection from Jillibean to create this page.


The background uses 2" squares from various papers from the collection.  Once i glued on the page, i used simple hand stitching to join them together, and curl t he edges of the papers a bit.


For the picture, i added layers of the same papers behind it, and added clusters of embellishments (all from the collection) along with feather cut outs; these were created using a cut file from Handipaper and then painted gold with Shimmer watercolor from Prima Marketing.


I chose to keep the location of the title and lines of journal as in the sketch, and used bold black alphas (Shine On collection- Amy Tan) for this.  A few splatters of gold and black ink complete the page.


Stop by the Scrapbook Nerd Shop to check all the materials used in this page, and check the sketch in the Scrapbook Nerd Friends and Family page on Facebook.

As always  do not hesitate to contact me with any questions!

XO

Sep 4, 2019

TREAT YO'SELF - Scrapbook Nerd


Hi there!

With the kids finally at  school, i am able to work on projects that have been on hold for a while.   This new layout for Scrapbook Nerd was one of them, as i had set the picture and collections aside until  i found the right cut file, and time!


The idea for the page came from this cut file from Handipaper.  I chose to enlarge the image, cut it from white cardstock, and then backed it with papers from the Hooray and All Heart collection from Crate Paper.


Before setting the images on the page, i added a bit of diluted black ink to the background so that all the colors stand out on the page.   Then used foam adhesive to attach the picture and cut out in place.


   To bring the focus of the page to the picture, i added my embellishment clusters around the picture.  I used pieces from the Hooray and Birthday Wishes collection to bring the festive look on the page.


To create the title for this page; first i trimmed a bit of the background (top and bottom edges) and attached strips of papers in place.  I used the bottom corner to add my title using a sticker from the collection and a few extra embellishments.   To finish, i sprinkled sequin through the page, and added a few spots of Vicki Boutin Glitter Glaze.  Here is the layout:


I love how this turned out. The colors and the cut file bring the festive feel to the page.  You can see how it all came together in the following video:


Please do not hesitate to contact me with any questions on how this came together, and check Scrapbook Nerd for all the materials used in this page.


XO