Showing posts with label JustNick Studio. Show all posts
Showing posts with label JustNick Studio. Show all posts
Oct 4, 2019
OUR STORY - JustNick Studio
Hi there!
Nathalie with you today with a new project that is all about my family. Once in a while I like to create covers for my albums, and the newest word cut files from JustNick studio were perfect to create a new cover.
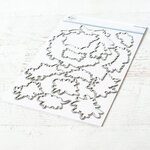
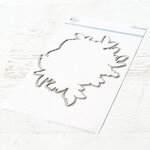
I wanted to frame the cover page, so i used the Floral Corner cut file to create the floral frame for the page. I copy and rotated the file so that i had a piece on each corner and weld them all together.
I cut the frame out of smooth white cardstock and attached it to the background using a bit of foam adhesive so that it gives dimension to the page.
To create the title of the page i used the Story cut file to create the "Our Story" cut out from white cardstock. Each letter was then backed with papers from the new Pebbles' This is Family collection.
Once i set the title on the page, i added a picture of my family and added a few clusters of ephemera and stickers around the title and picture. To finish the page, i cut two of the smaller images from the Beautiful Butterflies cut file, glue them together and pop them at the bottom of the page.
I love how this project turned out, and it was so easy to put together using the beautiful Just Nick Studio cut files; so make sure to check them all out. Remember to contact me with any questions on how this came together.
Sep 18, 2019
AUTUMN LOVE - JustNick Studio
Hi there!
Nathalie with you today with a new layout all about those warm cozy feelings Autumn brings along. I usually look forward to Nicole's emails with the new upcoming cut files, so when i saw the new Fall Foliage Background (coming soon to the shop) i just had to use it on a page.
I love Fall colors, so i wanted to highlight them on the page, as the background for the beautiful cut file.
To bring out the details of the cut, i chose to create my own background using VIcki Boutin's Pop Acrylic paints. I simply masked the cardstock and used a flat brush to create the ombre square on the page.
While the background dried i cut two Fall Foliage backgrounds ( to fit the colored square) from white cardstock, glued them together, and then glued them to the background. I made sure some of the leaves were not glued fully together, so that they create interest on the background.
The picture of my babies was converted to black and white and added at the bottom corner of the square. I used one Leafy Floral cut out to decorate the bottom of the picture along with a few phrase stickers. Then for the title, i used a combination of alphas and the word "Love" - this was created using the Love 1 cut file from kraft paper-.
I love how this turned out, the boldness of the background creates the perfect canvas for the cut file and makes everything on the page pop. Remember to check these JustNIck cut files and all the new files that are revealed each week.
Thank you so much for stopping by,

Sep 2, 2019
WONDERFUL MOMENTS TOGETHER - JustNick Studio
hi there!
Nathalie with you today to kick start Word Week. I love large bold titles, so this was an easy assignment for me, specially when i get to work with some of the JustNick Studio designs.
For this page, i combined the Moments, Word 3, and Love List cut files to create the large title/background. Since i am using a non-white background, i chose to cut each image from white cardstock.
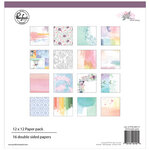
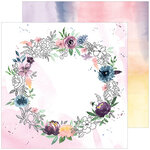
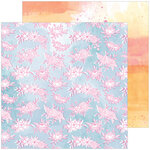
I used the new Pinkfresh Studio Just A Little Lovely collection to back the letters of the Moments cut file. A bit of foam adhesive between the patterned paper and the cut out create dimension on the cut out.
I cut each word separately,and then glued them together before attaching them to the background. Once the title was in place, i added a picture of my kids and littles at the top of page, nestled in the "wonderful" word.
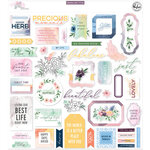
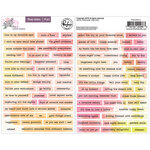
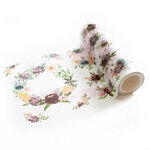
To decorate the page, i used the new Pinkfresh Studio Painted Florals Washi tape and coordinating dies. I clustered the image together to form a visual triangle in the page, then added some phrase stickers and gold ink splatters.
I love how this turned out, and how easy it came together. Mixing and matching word cut files from JustNick Studio will surely yield a one-of-a-kind image for your next project. Make sure you check them all up!
XO,

Materials used (images contain affiliate links)
Aug 23, 2019
LIFE CURRENTLY - JustNick Studio
Hi there!
Nathalie here with a new project for JustNick Studio. I don't know about you, but time is flying by and i see how it is making my babies turn into young adults. With so many changes, it is always good to document the good and bad days, so i chose a few of the store's cut files to create this page.
It all started with a bit of mixed media, black acrylic paint to be more exact on the background of the page. While that dried, i used the Floral Swag 2 to cut two large images from white cardstock.

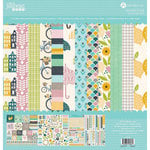
I used papers from the Spoonful of Soul collection from Jillibean soup to back and layer behind the picture. This was then nestled between the two floral images.

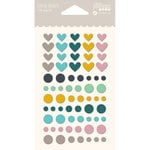
The cut outs mark the location of the photo, so embellishing was easy. Just a few stickers, and enamel dots were necessary.

To create the title for this page, i combined the Hashtags 1 cut file with the Here and Now cut file. I chose cut the word "currently' from white cardstock, and the "life" word from the packaging of this collection a few times. These were stacked together, and then glued to the bottom left corner of the picture.
I love how this turned out, and how easy it was to put together using the JustNick studio cut files. Make sure you check the designs used here, and all the new designs added weekly. If you have questions on how this came together, please do not hesitate to contact me,
xo
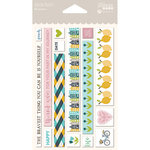
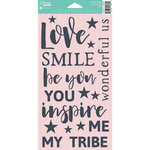
Materials Used (images contain Affiliate Links)
May 17, 2019
ALWAYS REMEMBER TODAY - JustNick Studio
Hi there!
Nathalie with you today with a new layout fit for our "word" challenge. I love large titles, so this theme fits right up my alley, and with so many cut files available in the JustNick Studio store, this was just a dream to put together.
To start this page, i pulled together the Word 3, Love List and Word 2 cut files to create the title of the page, "ALWAYS REMEMBER THIS". I simply pick a word of each file and weld them together so that they naturally create a space for the picture.
Once the words were welded, they were cut twice from white cardstock and once from a paper from the Pinkfresh Studio's Everyday Musings collection. The white cut outs were glued together, and then the patterned paper cut out was attached to the white ones with a small offset so that it creates the illusion of dimension.
To add color to the background a bit of liquid watercolor (Pinkfresh Studio) was added so that it covered all the area where the word and picture would sit. While the background dried, i pulled the new Butterfly cut file to cut a few outlines and the shapes from white cardstock and patterned paper.
A few stickers and embellishments from the Everyday Musings collection were added around the layout. A few lines of journal and gold ink splatters completes this page.
I hope this inspires you to check all the word files and other designs in the JustNick shop, the choices are infinite when it comes to mixing and matching designs to create a one-of-a-kind cut out for your project.
XO
Subscribe to:
Posts (Atom)


