Showing posts with label Sunday Sketch. Show all posts

Sep 8, 2019

SUNDAY SKETCH - Citrus Twist Kits


Hi there!
Nathalie with you today bringing you this week's Sketch Challenge.   We all could use a bit of help when creating our pages, and sketches are the perfect starting point.   Add to that the September add-on kit and you are in for a complete treat.  But let's start with the sketch:


And this  is what this sketch inspired:


I tried my best to stay true to the sketch, and almost accomplish it, but i needed to put my own twist on it, and messy it up a bit with mixed media.


This month's add on kit is packed with papers and embellishments from the new Maggie Holmes' Heritage collection.  I chose all the soft colors for the layers behind the picture; however i grounded the entire page by adding a layer of navy patterned paper at the base for the page (Shimelle's Collection).


One of the biggest changes was replacing the layer of paper next to picture with a pocket for my journal card.  I used vellum to create the envelope pocket, and alter one of the Digital PL cards to add my story using the computer.


I kept the embellishments placements just like in the sketch, and also decided to repeat the stamping details under the title using the Simple Word V2 stamp here.  You can see how it all came together in the following video:


Just love how easy this came together using the sketch as inspiration for the page, especially when including this month's Add on kit with it.


Remember to share with us your project inspired by the sketch.   We love to see what you create.   If you have questions on how this came together, please do not hesitate to contact me, and stop by the CTK shop to check the kits and stamps (there is a sweet promotion happening, too!)


XO,


Jun 30, 2019

SUNDAY SKETCH - Citrus Twist Kits


Hello everyone!
Nathalie here with the last sketch on June... Tomorrow a new kit will be revealed (and it is a beauty!), but before we get new goodies, let me show you how i made the most of my kits using this week's sketch as inspiration.  Here is this week's sketch:


It is a rather fun sketch, as soon as i saw it all i could think of was a grid  of some sort.   First i decided to use the sketch with the left over pieces from my Around Here  Life Crafted Kit in my Life Crafted album:


For this layout, i decided to divide the sketch in  half and follow it as close as i could.  Since the pictures are in color, i decided to chose rather neutral papers for the layers behind them.


The secret to balance the sketch was to keep everything at the same level/border.  So, once i had the limits marked, i used the typewriter to add my lines of journal, and then glued the layers in place.   I added the extra tag above the small strip of paper at the bottom of the picture to help balance the page.


I followed the sketch for the other side of the layout, but added a few things just so that it helped me tell the story of the pictures.   All the gorgeous ephemera pieces about "creatives" was perfect for this side, so i just added them to the clusters and then stamped some sentiments from some of this month's Stamp sets.   Love how easy it came together, but i tried the same sketch with the add-on kit for a 12x12 layout.


I wanted all those pastel colors in the Add on kit to create this page about my daughter's first horse-riding adventure. 


I started with creating the layers behind the picture using all the papers from the add on kit.  However the bottom layer of the pictures is one of the large Alpha pieces (Maggie Holmes Sunny Days collection) as they had a vibrant and solid look to them.


To bring the grid look of the sketch to the page, i decided to mount my layers on a piece of vellum.  This helped with limiting the space for the layout, and made layering the papers much easier (a little chipboard and foam adhesive help to create the soft shadow behind the layers).


I wanted to keep the soft look of the page, so instead of adding those paper strips to the corners of the page, my  choice was to create a small shaker pocket.  For this, i simply used a ruler and penciled the rectangles, then hand stitched the rectangles and fill them with sequins.


To finish the page, I used one of the ephemera pieces from the Around Here kit in combination with the stickers from the add on kit, added a few gold ink splatters, and then added my lines of journal with gold ink (and smudge a bit of it with my hand, too).

Just love how these turned out using the sketch as the starting point for the layouts.    If you have questions on how these came together, please do not hesitate to contact me!

XO


Materials used ( the images contain Affiliate links)


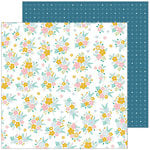
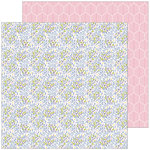
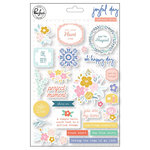
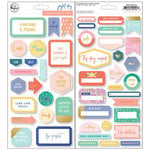
Pinkfresh Studio - Joyful Day Collection - 12 x 12 Double Sided Paper - Just Right Pinkfresh Studio - Joyful Day Collection - 12 x 12 Double Sided Paper - Being Us Pinkfresh Studio - Joyful Day Collection - Puffy Stickers Pinkfresh Studio - Joyful Day Collection - Cardstock Stickers with Foil Accents Pinkfresh Studio - Out and About Collection - Cardstock Stickers Pinkfresh Studio - Joyful Day Collection - Ephemera Pack with Foil Accents Pink Paislee - Horizon Collection - 12 x 12 Double Sided Paper - Paper 1 Crate Paper - Sunny Days Collection - Die-Cut Alphas

Oct 28, 2018

Citrus Twist Kits - Sunday Sketch with Nathalie


Projects created for Citrus Twist Kits  for the Sunday Sketch Challenge


Hi there!  
Nathalie with you today with this week's Sunday Sketch.  I love working with sketches as they provide inspiration, sort of the starting point for a project, and this week's sketch is  a super fun one.  So, let me show you:


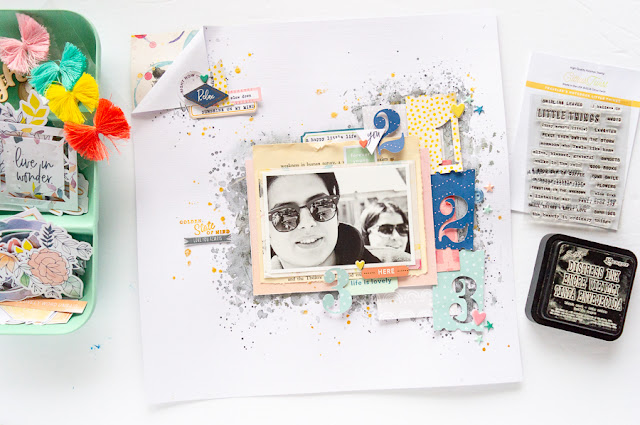
I love this sketch so much that i used it to create two different projects using the "Little Things" Scrapbook kit and embellishment kit.  First let me show you how i used the sketch to create a 12x12 scrapbook page:


Those ticket cut outs (created with one of this month's cut files) were a large part the inspiration for this page.  Since the  sketch was designed for a 8.5x11 format, i chose to extend it fit a 12x12  but chose to stay very true to the sketch through the transformation.


I wanted to play with the patterns and colors of the Little Things kit so i used some of the papers in the Scrapbook Kit and patterned paper play kit to create the tickets and layers behind the picture.


Since there is a lot of color and patterns being used in the page, a bit of  black Distress Ink was used to create a neutral background for the page. Once all the layers were added to the page (as per the sketch), i decided to embellish the page using the numbers from the tickets cut outs, stickers from the Embellishment kits and lots of elements from this month's cut apart card. 


To accomodate extend the design to fit a  12x12 layout, i chose to add the small fold at the top left corner of the page so that it brings interest to the page.     The next video will show you how this was created using the Little Things kits:


It is amazing how a sketch can inspire to create a project, but this sketch is so versatile that i also used it to create a TN entry in my daily Journal:


Once again, i used the Little Things scrapbook, Embellishment and Patterned Paper PLay kits to create this page. 


To create this entry, i chose to use the number tickets as the highlight of the page, and used them to create the background for the picture placement.   To reduce the bulk , i chose to just use a reduced number of layers, and then embellished with stickers from the embellishment kit and stamp images from the Little Things TN stamp.


My title was placed using the stickers and cut apart element sheet from the Little Things kit;  I chose to keep it as shown in the sketch so that it brings texture and interest to the other side of the TN entry.   I typed my journaling at the bottom of this page, and added some more stamped images to complete the look  of the page.


Now it is your turn to use the sketch as inspiration to create a project of your own.  Remember to share with us on the Citrus Twist Kits Fan Page on Facebook what you create with this sketch, or on social media by tagging Citrus Twist Kits .  We would love to see what you create.

XO


May 20, 2018

Day Dreamer


Scrapbook Layout created for Citrus Twist Kits  -  DAY DREAMER -


Hello everyone!  It is Sunday, which means time for a new Sketch , and this one is such a fun and versatile one.


Gotta love all those layers behind the picture.  Well,  I used this month's Malibu Scrapbooking, and Embellishment kits to create my take on this week's sketch.


Sketches are a great starting point for projects, and  i chose to remain true to the sketch after flipping it 90 degrees.


All the layers behind the picture are created following the ones in the sketch.   I even used the Circle Punch Cut file to create the layer that sit behind the picture from one of the papers in the Scrapbook main kit.


I was so excited to see the small music sheet in the Malibu Main Kit, and used it in this page to convey the sentiment of the picture.   The pink tulle also was added as a layer behind the picture.


To bring a bit of texture to the page, i added some mixed media so that it just peeks from under the paper cluster.


The only difference between the sketch and my page (besides the rotation) is that i replace the long thin strip of paper for the gold puffy leaves from Crate Paper's Flourish collection that are included in the main kit.    The following video will show you how this page came together:


Now it is your turn to be inspired to create a new project using this week's Sketch.  I cannot wait to see your take on this sketch!  Remember to use today's date when sharing your creations on the CTK Fans Facebok Page, or by tagging #CitrusTwistKits when sharing  your creations on social media.


Have an awesome week!

XO

Nathalie