Dec 30, 2017

Merry Memories


Scrapbook Layout created for Simple Stories  - MERRY MEMORIES -


Hello everyone!

Where has December gone!  It is hard to believe we just celebrated Christmas, and what better way to document those memories than to use the super fun and gorgeous "Oh What Fun" collection.


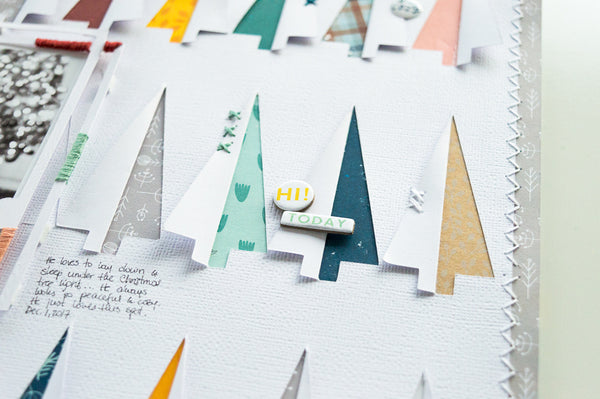
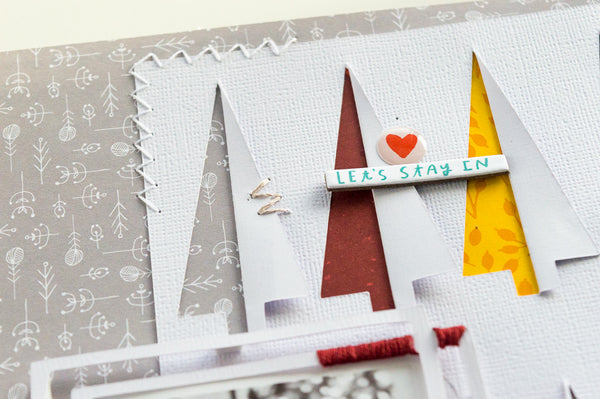
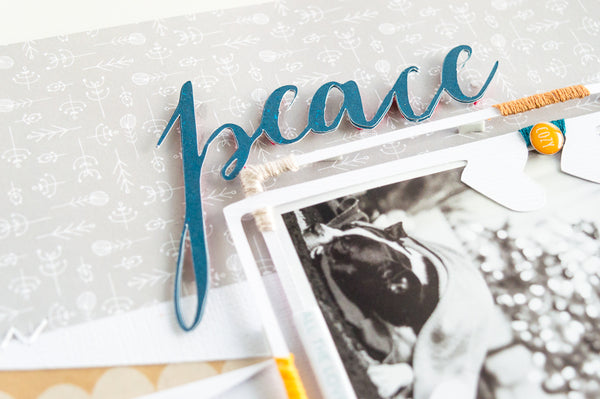
This picture of my littles was fun and playful (even when it is a bit blurry!), so I wanted to create a soft background for the page, and pulled a cut file from Just Nick Studio.   All those small holly berries and branches bring some texture to the page.


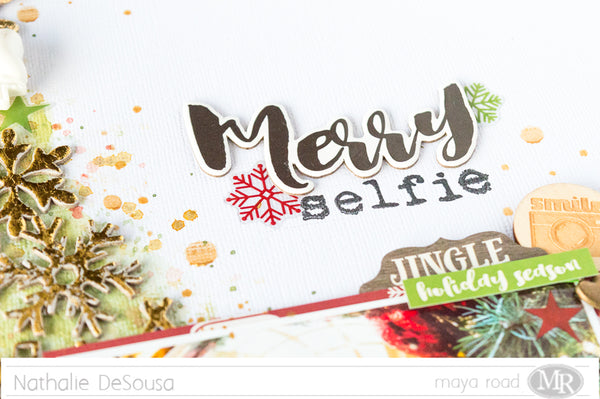
To bring playfulness to the page, I chose to create a colorful and large title, for this I pulled the Merry Wishes cut file from Just Nick Studio and used all the papers from the Oh What Fun collection to back the letters.  Then cut the script word from one of the papers from the collection.


All the fun elements from the "Oh What Fun" collection are so gorgeous ( i think I am left with small pieces from the collection!) that i had to use them to highlight the picture.   Gotta love that reindeer, just like my little nephew in his antler hat.


What is not to love of the "Oh What Fun" collection!!  the designs, the colors are just perfect to document  your most beloved memories.  

Well now it is only fitting, I wish you all a Blessed New Year!  


Dec 26, 2017

Let It Snow


Scrapbook Layout created for Scrapbook Nerd -  LET IT SNOW  -


Hi there!

   Hope you all had a blessed and peaceful Christmas!  Now, we start the countdown to the end of the year.  Wow, time has flown by!

 Today, I wanted to share with you a small idea on how to mute busy backgrounds using a bit of mixed media.  I found it that many times I love the patterned paper i  want to use as a background, but it becomes too busy when I start adding on to it.  One of my solutions for this is to mute the background using gesso or white acrylic paste.  The following video will show you how I go about it.


      As you saw in the video,  backgrounds can easily be muted/toned down by adding a bit of mixed media to it.  In this particular page, white acrylic paint was used for this, however white gesso will also work to create a very similar result.


    The key for this technique is to use an acrylic paint brush.   These types of brushes have a harder/sturdier bristle (either plastic or nylon) which helps when stippling/stretching the paint on the page.


    A dry brush was used to spread a very little amount of paint on the background sparingly.   Though it seems the paint covers the background, once it dries it becomes translucent, hence toning down the intensity of the background.


     The background paper from the Winter Meadow collection from Photoplay is quite busy, but the technique makes it possible to add a cut out  -created with a Just Nick Studio cutfile- seamlessly.  


    Once the cut out is put in place, the page comes together easily by adding some embellishments from the collection, as well as Crate Paper's Snow and Cocoa collection.   Here is the completed layout:


   This technique will easily let you use those busy background papers  seamlessly in your next layout.   Remember to check the Scrapbook Nerd store for all the materials used in this page.   There are so many new things arriving at the store. Let me know if you have questions on how this came together,  I would love to   help you!   Have a Happy New Year!

Dec 23, 2017

A Christmas Classic 2014


Scrapbook Layout created for Simple Stories  - A Christmas Classic 2014 -


Hello there!
Nathalie with you today to bring you some inspiration for the upcoming Christmas season!   This time, I wanted to document a "classic" Santa portrait using the gorgeous "Very Merry" Collection.


The wreath that frames the background was created from a Silhouette design, and backed with papers from the Very Merry collection.  All those classic designs, and rich colors create the perfect background for the picture.


To bring the picture forward in the design, embellishments from the collection were layered in clusters around the wreath, and in clusters around the picture.


The title of this page tells the story of the layout  (this is one of my favorite pictures of my littles - a true "classic"-), and was formed using pieces from the Very Merry collection (chipboard, cardstock and clear stickers) as well as some sn@p Color Vibe Bold alphas.


The color combo, and beautiful designs are perfect to document all your Christmas memories.  Don't forget to check the Very Merry collection - you will love  it!

Have a blessed Christmas!!!


Dec 22, 2017

Time Together


Scrapbook Layout created for Citrus Twist Kits  - TIME TOGETHER -


Hi there!

It is time to show you one more project created with the beautiful December "Sonoma" kit from Citrus Twist Kits.   This time, I limited my color palette, and decided to add mixed media to create this simple and clean design.   


It all started by using some watercolor to create the soft background.  Then a few details were added using some gold modeling paste through a stencil.     The finished background was then stitched to some pieces of paper from the kit!


To keep the page simple, the clusters on the pictures were also limited to the same color palette, and built completely by layering ephemera and sticker pieces.


To complete the visual triangle, a small cluster of pieces and mixed media was added to the opposite side of the picture.    A thin line of gold ink drops and stencil lines connects this cluster to the picture.  Here is the final layout:


Love the soft feel of the page, and the layers of mixed media and papers created in this layout. 
I hope you are inspired to create a page of your own,   Remember to check Citrus Twist Kits for all their kits  (they are all gorgeous!!!).   I am always a comment away if you have questions on how this came together.


Take care!

Dec 20, 2017

Joyful Joyful Heart


Scrapbook layout created for Wild Whisper  - JOYFUL JOYFUL HEART -


Hello there!


I am up on the Wild Whisper blog with my last project as part of their design team. 

The layout was created using their new HOME FOR THE HOLIDAYS collection, some mixed media, and a Paige Evan's cut file.


Stop by the Wild Whisper Design website to check all the collection, and all the details on this page.   It has been a pleasure working with their products, plus Suzy and Heather are lovely!  Will miss them both! 

It is all for me for now!


See you soon!

Merry Selfie


Scrapbook Layout created for Maya Road  - MERRY SELFIE  -


Hello Roadies!
 Nathalie here with a bit of Christmas inspiration using the beautiful Maya Road products.  I am sure by now you all are almost ready to get together with your families, and record all those sweet moments, but always remember to include yourself in the picture!   Today, I want to show you how i documented my latest selfie.
  

To create this layout, a simple triangle was drawn on white cardstock -to recreate the Christmas tree-;  then a few shades of green watercolor were added to give it some color and dimension.   While the background dried, all the snowflakes from the Snowflake Mini Chipboard set were gold foiled.
 

Once the background was dried, all the snowflakes were then glued inside the watercolor tree.  A  White Pretty Resin bow was added to the top of the tree to add texture, and mark the tree topper snowflake.


This layout was created, and embellished using Simple Stories's "Very Merry" collection.    The colors in the collection match perfectly that of the ones in the picture.   


There are small clusters of ephemera and embellishments cluster around the layout.   On the top corner of the picture, a Wood Snapshot token,  a small heart from the Ken Oliver Lock My Heart Charm set, and a few pieces from the paper collection create a little cluster that bring attention to the picture.


The title for this page was created using one of the Very Merry chipboard stickers, and the Just My Type Clear Stamp set.   A few more embellishments and a few drops of gold ink complete the page.


I hope this inspire you to mix some of the beautiful Maya Road products with some of your favorite paper collections to document a picture of you!  Just look at how easily you can bring your picture to life.  Stop by the Maya Road store to check all the products used in this project.


Please do not hesitate to contact me if you have questions on how this came together.

Have a Blessed Christmas, and may 2018 be filled with love and peace!


Maya Road products used:

Dec 19, 2017

Merry Cheer


Scrapbook Layout created for Scrapbook Nerd  - MERRY CHEER -


Hi there!


 It is starting to look a lot like Christmas, and i am loving it. Especially when I get to document some of the happy moments of my loved ones.  This time, I have created this layout for Scrapbook Nerd using the beautiful FALALA collection from Crate Paper.


To create the background for this page, I used a Paige Evans' design; but chose to draw it on the cardstock, so that it can then be cross stitched.    The texture of the page, and the design are just perfect for the picture of the littles.


The beautiful cut file needed to shine in the page, so I chose to create a few clusters in the page being careful not to  cover much of the stitching.


To add movement to the page, I decided to trim the stitching, so that the stars will form a beautiful border that will contrast the background paper.   The title was then created using stickers from the collection, and MME's Oh Joy collection,too.   Here is the final layout:


I love this page.  It does combine some of my favorite things and techniques along with a picture of my littles.   It took a bit of time to create the background, but it was all worth it at the end.

Remember to check Scrapbook Nerd for all the materials used in this layout.   They are always adding new stuff to their shelves, so stop by the store to see what is new in the store.

I am always  a comment away, if you have questions on how this came together!

Take care!!!


Dec 18, 2017

Peace


Scrapbook Layout created for Just Nick Studio  -PEACE -


Hello everyone!

Nathalie here with a new project filled with  Christmas spirit.   I just love this time of the year,  it seems like my home becomes cozier as we approach Christmas.  With that in mind, I created a project all about my baby and his favorite spot during the holidays.


As you can see our baby loves to nap in front or under the Christmas tree!  So what better way to document this picture than to create a background filled with Christmas trees.


The Christmas tree background was created using the Fold a Tree cut file and some white cardstock.   The cut was sized to about 8.5x11 in and most of the free spaces were backed with papers from the Studio Calico's Northern Light kit.


The cut out was then hand stitched to the background paper.  To add more texture and interest to the page, a few stitches were used to secure the folded piece to the mat in some of the background trees.


To frame the picture of our baby, the rectangular frame image from the Infinity Hearts was cut form wood grain white cardstock.   A bit of embroidery thread was looped along some of the edges of the frame to add texture to the page.


The title of this page was created using the Script Font cut file.  The word "Peace" was welded together, and then cut twice from one of the papers from the Studio Calico's Northern Lights kit.  A bit of foam adhesive pops the title from the page.


I love the end result of this page.  The non-traditional colors combined with all the cut files and hand stitching complement the picture of our baby peacefully sleeping under the Christmas Tree.

Remember to stop by Just Nick Studio Store to check all the cut files used in this project, and all the new designs being added to the store.  If you have questions on how this came together, do not hesitate to contact me.

Have a blessed Christmas!