Showing posts with label Crate Paper. Show all posts
Jul 4, 2020
LOVE YOU - Scrapbook Nerd
Hi there!
We are in July already, and like much of the world, we are slowly starting to restart our new normal life here in Toronto, after almost 4 months in quarantine. Well, that has meant that birthday celebrations have move to a more virtual way. So, i pulled a few pictures from my little sister (23 rd ) birthday to create this layout for Scrapbook Nerd.
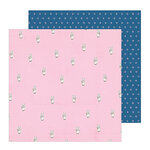
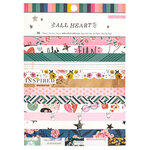
I started with a cut file from Handipaper ( my friend Inna has beautiful cut files in her shop), and used Pink Paislee's Bloom Street to back all the flower spaces. Once i had it ready, i tied a tag from Heidi Swapp's Honey and Spice collection at the bottom of the flowers ( this serves as a title).
For the base of the page, i cut a piece of paper from the Magical Forest paper pad ( Crate Paper) to serve as the base of the layout, and glued the cut file to it, then added one small butterfly sticker. For the other half of the page, i baked the pictures with a paper from Bloom Street and once i glued it to the background, added my journal below it.
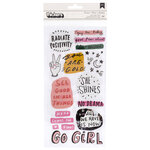
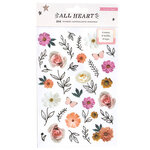
I added a few more stickers to the page, and a second butterfly at the side of the pictures to complete the spread. Just love how it turned out.
Remember to stop by Scrapbook Nerd to check all the materials i used in this page, there are new goodies always arriving at the shop!
XO
Dec 12, 2019
COZY & BRIGHT - Scrapbook Nerd
Hi there!
It is almost here! and i am yet to do my Christmas shopping!!! Instead, I have spent time putting some of my Christmas passed memories into pages for my albums. Today, i want to share this page all about my baby, and his love for the tree and blankets.
A few weeks ago, I purchased the Nuvo Shimmer Powders from Scrapbooknerd, and finally broke them out to use in this page. It is no secret I love mixed media, so this colors made the perfect background for the page.
I first added a bit of texture paste through a the Poinsettia Pattern stencil from Echo Park, and then used Cherry Bomb, Red Scarlett and the green powder to add the color on the page. I finished the background with a bit of gold ink.
while the background dried, i cut papers from both the Merry Little Christmas from Pebbles and Snowflake from Crate Paper to back the pictures of my baby. Then attached them to the background with some foam adhesive.
I kept the embellishments very simple, by creating a few clusters of stickers and embellishments from the collections ( plus some FALALA from Crate Paper) around the pictures and in a soft diagonal line on the page.
The last step was to add a title (alphas from Pink Paislee's Ivy collection) and then a few strips of papers on the sides of the page. I love how this turned out, and how quickly it came together. The colors of the powders are just to die for, too.
Remember to stop by Scrapbook Nerd to check all the materials i used in this page, and please do not hesitate to contact me with any questions.
XO
Nov 25, 2019
HOLIDAY TRADITIONS - Scrapbook Nerd
Hi! it is time for some inspiration for Scrapbook Nerd, and it is also time to pull all the festive goodies and document Christmas!!! Well, i am all about playing with paper and glue, but when it comes to Christmas, there is just a little extra incentive to get creative.
For this page, i mixed a few different things that i am loving lately. One is the papers in the This is Family collection from Pebbles, the colors and designs in the Merry Little Christmas also from Pebbles and circles.
I started by punching circles from the 6x6 paper pad from Pebbles and the 6x8 paper pad from Crate Paper's Snowflake collection. I punched a hole at the top of each circle so i can form a banner with the circles, and wrapped the cord around a piece of 8.5x11 cardstock.
Once the banner was set in place (foam adhesive and glue dots are holding the circles in place) i glued the letter size cardstock to a paper from the THis is Family collection, and then added the picture so it sits between the two pieces of paper.
i used embellishments from Pebbles, Simple Stories, Crate Paper to bring the Christmas sentiment to the page. Lots of pops of red, gold, green and teal bring the festive look to the page.
All that was left to do was add a title ( Crate Paper and Pinkfresh Studio alphas) and some lines of journal. The gold stamped elements were created with a stamp set from Citrus Twist Kits.
Just love how it turned out, and all the space i still have to write my lines of journal!!! I hope this inspire you to pull some of your favorite things and mixed them up on your next page, and make sure you check Scrapbook Nerd for all the materials (there are so many new collections and good ol' staples),
XO
Oct 29, 2019
BOO CUTE! - Scrapbook Nerd
Hi there!
Halloween is one of those fun holidays that i am missing more and more as my kids grow up, but thankfully i still have my fur baby to dress and parade around. So, today i am building a page all about our last Halloween using the new Hey Pumpkin collection from Crate Paper that i picked from Scrapbook Nerd.
It all started with a purple piece of cardstock, and added a bit of Vicki Boutin gesso with my brush to the center of the page. Once it dried, i added a bit of black ink using the packaging technique followed by Heidi Swapp Gold Color shine and Altenew Metallic Cosmic Berry ink and Pure White ink. To finish the page, i used a bit of Vicki Boutin Black art crayon with a Stencil brush through a Kaiserkraft Stardust once the liquid had completely dried.
I chose to work with the large haunted house pieces of ephemera and chipboard and used them to create the scene of this page. I kept the picture simple with a few layers of cardstock and papers -from the collection- and nestle it between the houses.
The title of the page came so easy together by mixing both Chipboard and the alphas from the collection.
To balance the page, I cut about 1" from the bottom edge, distressed the edge and then added some paper layers under the edge and created a small cluster at the junction of the paper layers. Here is the final layout:
I love how this turned out, and how easy this came together and all the layers. The following video will show you how this came together:
I hope this inspires you to document your Halloween memories. Remember to check the materials used on this page at the Scrapbook Nerd shop. As always if you have questions on how this came together, please do not hesitate to contact me!
XO!
Aug 12, 2019
SIXTEEN - Scrapbook Nerd
Hi there!
I am starting this week with a new project and process video for Scrapbook Nerd. With life always being so busy, it is nice to still document it but in a quick and short amount of time. So, i decided to challenge myself to use a patterned paper as a background, and it all came together in less than 40 minutes.
First, i added a bit of paint to the background so that it will create a blank space for the layers. A little bit of black acrylic paint was all that was needed for this. While that dried, I pulled the 6x8 paper pad and some of the ephemera pieces and started layering them behind the picture.
Once all the paper was cut, i chose to go ahead and create a fold on the background. I wanted to show both sides of the paper and also bring the focus to the picture on this page.
To keep the layout balanced, I opted for adding the same patterned paper used as the bottom layer behind the picture. The folded line was the perfect spot to add the title, and a few extra embellishments.
All that was left was to embellish the page using all the goodies from the collection. I chose to add one of the puffy frames to the picture as a means to make the subject more prominent. A few extra paint splatters and some lines of journal complete this page.
Love how this turned out, and how easy it came together in less than 40 minutes. The following video will show you a more in depth look of the page:
I hope this inspires you to create a project of your own. Remember to check all the materials used in this page in the Scrapbook Nerd store, and to contact me if you have questions on how this came together.
XO
Materials Used (Images contain Affiliate Links)


May 6, 2019
YOU & ME - Scrapbook Nerd
Hi there!
This week the DT for Scrapbook Nerd has been asked to create projects all about flowers and gardens. So, i pulled the new Maggie Holmes' Sunny Days collection -cause her florals are always some of my favorites- to create this page.
I started by adding a bit of mixed media to the right bottom corner of the layout using VIcki Boutin's Watercolor Markers in Blueberry Pie, while the background dried, I fussy cut the flowers and paper strips from the 12x12 paper pad, and also created a vellum pocket to hold my lines of journal.
I stitched the strips of paper to the right edge of the page, and then used pieces of paper and ephemera from the collection to back and layer the picture.
All the fussy cut florals were then used to create clusters around the picture. A few extra stickers, ephemera pieces and clear stickers were then added to the clusters around the picture. The gold glitter alphas of the collection were then added to create the title for this page.
I love how this turned out, the flowers are a complement to all the layers of paper, while the mixed media creates enough contrast to highlight all the papers and picture in this page. You can find a Layout tutorial in the Scrapbook Nerd Instagram account, and all the materials used in the Scrapbook Nerd shop.
If you have questions please do not hesitate to contact me.
XO
May 3, 2019
CITRUS TWIST KITS NSD 2019 BLOG HOP
hi there!
Welcome to the Citrus Twist Kits (i)National Scrapbooking Day Blog hop. You must be arriving from Diane's blog. It is a busy day, call it our holiday! so CTK wants to share some inspiration and also give you the chance to win some prizes along the way.
My challenge today was to use a pocket in my Life Crafted layout, so i pulled pieces from this month's Add on kit to create this page:
Part of today's celebrations include some cut pocket cut files, click here to be taken to the CTK Digital shop. I used two of those cut files to create the pocket for this page using vellum, and another one to cut the title for this page.
For my page, i decided to cover one side of the layout with the Collage paper from the All Heart collection - included in the add on kit-, and then placed my picture there surrounding it with fussy cut flowers from one of the paper in the kit.
I used another piece of the same paper to create the strip on this page, and then glued my pocket on it. To complete my visual triangle, i added some fussy cut florals around the pocket, and then placed the title at the bottom of the pocket. Some repeating stamping around the page ( using some of this month's stamps).
I hope you have enjoyed the inspiration, and also picked up a free copy of the cut file.
Now it is time to visit Alena's blog, and continue hopping along until you end up on the Citrus Twist Kits Instagram page. When you get to Instagram after visiting all of our Creative Team contributions, just do the following:
* Like us - @citrustwistkits
* Tag us in a message to let us know you completed the blog hop on our NSD post
* Tag a friend in your message
We'll be doing random drawings throughout NSD 2019 and will message and tag you if you win. We'll be giving away everything from some of our new Life Crafted albums to embellishments to stamps and more. There is no purchase necessary to win.* Tag us in a message to let us know you completed the blog hop on our NSD post
* Tag a friend in your message
Here is a list of all the participants for your convenience.
- CTK blog: https://citrustwistkits.blogspot.com/2019/05/welcome-to-national-scrapbook-day-2019.html
- Diane: https://dearlydee.blogspot.com/2019/05/happy-inter-national-scrapbooking-day.html
- Nathalie: https://tachita55.blogspot.com/2019/05/citrus-twist-kits-nsd-2019-blog-hop.html >>>>> YOU ARE HERE
- Alena: https://alkobz.blogspot.com/2019/05/citrus-twist-kits-nsd-2019-blog-hop.html
- Theresa: https://larkindesigntm.com/citrus-twist-kits-nsd-2019-blog-hop-dream-big-dreams
- Marsha: https://heymarshamakes.blogspot.com/2019/05/citrus-twist-kits-nsd-2019-blog-hop.html
- Kira: https://scrappykiraness.wordpress.com/2019/05/03/citrus-twist-kits-nsd-2019-blog-hop
- Lydia: https://ashersmiles.com/2019/05/03/nsd-with-citrus-twist-kits/
- Patricia: https://roebuck-adventures.blogspot.com/2019/04/citrus-twist-kits-nsd-2019-blog-hop.html
- Anna: https://urascrap.blogspot.com/2019/05/citrus-twist-kits-nsd-2019-blog-hop.html
- Laura: https://youtu.be/19vnbUyRrH8
- Kelli: https://foreverandadaycreate.blogspot.com/2019/05/citrus-twist-kits-nsd-2019-blog-hop.html
- Emma: https://www.instagram.com/emmakw41/
- CTK IG page: https://www.instagram.com/citrustwistkits/
Cannot wait to see how this inspires you, remember to share your creations on the CTK Friends page on Facebook,
Thank you so much for visiting, and happy NSD to you!
Subscribe to:
Posts (Atom)