Showing posts with label hand stitching. Show all posts

Dec 9, 2019

CAPTURED - Freckled Fawn


Hi there!
It is that time of the year when everything is so busy and colorful, but my little heart always goes back to black and white (my favorite color combo ever), so when i got this month's Freckled Fawn kit, i think i squealed a bit!


My first choice is always mixed media, large titles and handstitching... So i played with my Vicki Boutin Art Crayons and create an ombre background for my page.   While that set,  i used my Cameo to cut the title from one of the papers and handstiched the letter using matching thread to the one on the background.


I wished the kit came with a collection of these wooden frames.  I wrapped some embroidery thread (coordinating color) around the edges of the frame and glued a picture of our baby behind it. 


The chipboard stickers in the kit are fabulous, so i used a few of them to frame the picture.  I added a few of the past kits god enamel dots so it helps to warm up the page a bit.  Then added my journal line about our beautiful boy under the picture.


To complete the page,  i added two clusters of labels , washi tape and enamel dots at diagonally opposite sides of the page to help balance the page and create a focal point in our page.


Just love how this turned out, and how fun it was to put together.  I am so in love with the Freckled Fawn 6x8 December kit that i am thinking about purchasing a new one!!  remember to check it out.

As always please contact me with any questions about this page!

XO

Jun 27, 2019

SUNSHINE ON MY MIND - Just Nick Studio

Hi there!
Nathalie with you today. In case you haven't visited the JustNick store lately, then you have missed the new TN cut files that Nicole has created. I am a TN lover, it is my most favorite way to document my everyday, and i couldn't be happier to use them in my Family album.


For this entry, i used the new -these will be available in the next few days- Sunshine On My Mind and TN Insert 3 to create this entry.


I size the Sunshine On My Mind cut file so that it fit inside a 4.25x8.25 in rectangle, and set the cut file to cut from white cardstock. I used Heidi Swapp's Color Fresh collection to back the cut out, and then used a paper piercing tool to create the stitching guide. A bit of hand stitching and some simple stickers complete the page. This was then glued to a 5x8.25 in paper (this is the size of my Citrus Twist Kits Life Crafted album/tn) and set on the album.


For the other side of the layout, i used the TN Insert 3 to create the cut out from white cardstock. My choice was to back the circle images with papers that match those on the title page, which meant that i would follow the color order and location of each paper.


The entire page was then backed with a paper from the Heidi Swapp Color Fresh collection, and then a few embellishments were added in a color blocking manner along the vertical line of the page.


I love how this turned out, maybe caused i am biased to the format and size, but TNs are a great format for many different types of documenting. Now add the new Just Nick studio designs, and it just perfection. Remember to check these cut files and the new designs always being added to the store. If you have questions, please do not hesitate to contact me!
XO


Materials Used ( the images contain affiliated links)

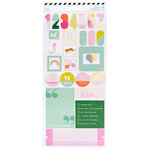
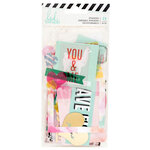
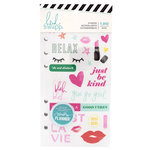
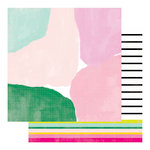
Heidi Swapp - Color Fresh Collection - 12 x 12 Double Sided Paper - Paint The Town Heidi Swapp - Color Fresh Collection - 12 x 12 Double Sided Paper - Llama Drama Heidi Swapp - Color Fresh Collection - 12 x 12 Double Sided Paper - Spectrum Heidi Swapp - Color Fresh Collection - Sticker Book with Foil Accents Heidi Swapp - Color Fresh Collection - Cardstock Stickers with Foil Accents Heidi Swapp - Color Fresh Collection - Ephemera with Foil Accents Heidi Swapp - Color Fresh Collection - Memory Planner - Sticker Book Heidi Swapp - Color Fresh Collection - 12 x 12 Double Sided Paper - Fine Line

Feb 25, 2019

Fun Day

Scrapbook Layout created for Simple Stories  - FUN DAY-


Hello Simple Stories Friends and Fans!  

Nathalie with you today with a super fun layout that features the new Say Cheese 4 collection.  What can i say!, Simple Stories has created the perfect collection as it can be used to document your memories at the theme park as well as your every day memories.  There are so many embellishments, papers, and designs to chose from that it makes is so easy and fun to create projects.


The inspiration for this page of my Goddaughter ready to visit the most magical place on the world was her head band.
 used the stencil as a guide to create the silhouette of the mouse head on white paper.  Next i used a few paper edge punches to create the scalloped paper strips out of all the black color papers that i found in the SAY CHEESE 4 collection, basic paper pack and 6x8 paper pad.   I glued the strips together on the paper silhouette and stitched around the edge of the silhouette to hold them all together.  All the extra pieces were trimmed so that the silhouette can be easily recognized. 


To keep the focus on the head band, i drew and cut  the image  of the bow onto the b side of the 4x6 Element paper of the Say Cheese 4 collection, and use some white thread to hand stich it to a piece of white cardstock.  Once the image was completely stitched and detailed, i fussy cut the cardstock leaving a small offset around the image, and glued it straight onto the head silhouette.


The B side of the Make a Wish paper serves as the base for the page.  A bit of white acrylic paint was added as a background for the head silhouette.   Once the piece was glued to the page, i used some of the Sn@p cards to back and pictures and glued to the layout.   There are so many embellishments to  chose from that it was so easy to create clusters of stickers, ephemera around the pictures.


Now, to complete this page, i used the new Fun Large Words Metal Die to cut part of the title from 6x8 paper - i used some white cardstock die cuts to create depth on the die cut-, and then used the  Happy Words Stamp and Dies to create the word "day".  To just finish this page, i added a matching bow clip to  the title, and a few lines of journal around the mouse head silhouette.


I am totally in love with this collection, and the possibilities (trust me i have created a few layouts with it already).  Whether you love the theme park or just want a fun colorful collection, the new SAY CHEESE 4 is definitely one  of the funnest releases from Simple Stories this year, and a must  for your documenting.   You can always contact me if you have questions on how this came together.

XO


Jan 7, 2019

Beautiful Girls


Scrapbook Layout created for Vicki Boutin DT  - BEAUTIFUL GIRLS -


VB_BEAUTIFUL GIRLS_Nathalie DeSousa


Hi there!

Nathalie with you today with a new project using Vicki's products.   We are used to adding mixed media to create backgrounds for our pictures, however  this time around i used a bit of Vicki's Magic to create patterned paper to back a cutout.

VB_BEAUTIFUL GIRLS_Nathalie DeSousa-2

To create the paper that backs the cut out, i started with a gessoed foundation paper, and then used diluted art crayons and a mister bottle to add color to the paper.   The color combination was chosen to bring the color of the jacket my niece is wearing. 

VB_BEAUTIFUL GIRLS_Nathalie DeSousa_close ups-2

Once the watercolor was dried, the flower impression was created using gesso, a stencil brush and the flower stencil from the All The Good Things collection.   The secret to create the soft impression without texture is to spread a bit of the gesso on a mat using a palette knife, and then pick a bit of it with the stencil brush, and then use it to create the flower impression through a stencil.

VB_BEAUTIFUL GIRLS_Nathalie DeSousa-3

While the background dried, the cut out was created by tracing with a pencil a piece of a heart at the edge of the cardstock.  Once the shape is cut, a bit of hand stitching was added -this is  an optional step, that can be omitted or replaced with machine stitching).  Then the piece was glued to the mixed media patterned paper created; a bit of fun foam helps to avoid having the page dip  due to the dimension added with the stitching.

VB_BEAUTIFUL GIRLS_Nathalie DeSousa-4

To mimic the patterned paper, two clusters were created at diagonal points of the picture.  Here i combined ephemera pieces, chipboard stickers, clear  and watercolor stickers. Gotta love all the flowers die cuts from the Field Notes collection.

VB_BEAUTIFUL GIRLS_Nathalie DeSousa_close ups


The title for this page was placed  inside the cut out using a combination of puffy word stickers and chipboard alpha.   A few drops of diluted gold glaze, enamel dots and a few lines of journal complete this page.    I have created a  video showing you how this all came together, enjoy!:


I hope this inspires you to check Vicki's products and to use them in your next project.  Remember you can always contact me if you have questions on how this all came together.
Have a great weekend!

VB signature

Jul 15, 2018

Sweet Dreams Little One


Scrapbook Layout created for Simple Stories-  Sweet Dreams Little One  -


Hello everyone! Nathalie with you today with a new layout that celebrates those sweet baby sleeping moments ( i so miss seeing my kids sleeping faces!).  The new Simple Stories  "OH, BABY!" collections are ideal to document all those sweet baby moments


To start this page, i drew a few stars on some of the patterned papers of the Oh, Baby! collection, and the Oh, Baby! Expecting collection,  backed them with white cardstock, and added a bit of hand stitching around the edges.


To create the title of the page, a JustNick Studio cut file was used.  All the letters of the cut out were backed using papers from the Oh, Baby! paper pad.  Having the smaller pattern of the large papers is perfect to combine and display a lot of color  in the title.  The chipboard sticker just completes the sentiment of the title and page.


I wanted to create a very soft look for this page, so I used a sheet of vellum to cover a light blue piece of cardstock, and added all the  the stars, picture and title on top of the vellum piece.


Just a few extra details were added to the picture and around the stars.  All those little star stickers are a easy way to complete the look of the page.   A few drops of gold ink were added to bring some shine to the page!


Love the softness of the page, and all the starry background is the perfect frame for my sweet sleeping cousin.  The new Oh, Baby! collections are ideal to document your parenting journey, and beyond!  Remember to chek them out at your local scrapbook store.
Well that is all for me for now.
XO


List of Supplies:
10115  Oh, Baby Collection Kit
10116  Combo Sticker
10127  4x6 Horizontal Elements
10117  Adorable paper
10129  6x8 paper pad
10130  Chipboard sticker
10131 Bits and Piecs
10132  4x6 Cardstock stickers
10133  Clear stickers
10247  Oh, Baby! Expecting collection kit
10249  Expecting you paper

Mar 3, 2018

This is ME


Scrapbook Layout created for Simple Stories  - THIS IS ME -


Hello Simple Stories friends and fans!

Nathalie with you today.  I am so excited to be returning for a new term as a member of the Creative Team.  I love Simple Stories and the people behind it all.  Thank you Simple Stories for inviting me back!!!

Every time, I think i have finally picked my favorite Simple Stories collection; they top it with another more beautiful collection.  This is the case of  the new I AM collection.  When it arrived at my doorstep, I fell in love with all the papers and embellishments, and quickly pull a picture that mostly represent me to create a layout with it!   


We always document all those special moments in our lives, but some times forget to tell our story.  So what better way to keep a memory of you than to create a self affirmation page.   For this, I pulled a cut file from the Silhouette store, and cut the title for this page from the B side of the 3x4 journaling cards.   A bit of coordinating hand stitching just adds texture, and brings all the colors of the flowers forward.


A bit of white acrylic paint on the B side of the Bold and Beautiful paper make sure all the details in the title pop.   To emphasize the "ME" in the title, the word was cut form another paper from the collection and attach with foam adhesive to the title.


The icons and stickers from the collection are perfect to create clusters and embellish the page. The florals of this collection are so beautiful you will want to get a few of the sheets to fussy cut them, and add them to your projects.  But let's not  forget the beautiful roller stamp; the sentiments are just perfect to create a self-empowering page;  a must have!!!


You will fall in love with all the patterns and colors from the Simple Stories  I AM collection, and  it will help you to document your own story.

XO


Materials Used:
I AM collection
10024 Collection Kit
10027  Bold and Beautiful paper
10034 3x4 elements paper
10039  Chipboard Stickers
10040  Bits and Pieces
10041  4x6  Stickers
10042 Clear Stickers
10044  Dreaming Big Washi Tape
10045 Roller Stamp