Showing posts with label Oh My Heart collection. Show all posts

Sep 18, 2018

The Good Life Today


Scrapbook Layout created for Scrapbook Nerd  - THE GOOD LIFE TODAY -


Hi there!

Hope you all are well!  This week's assignment for Scrapbook Nerd was to create projects based on everyday moments, which is perfect for the way i document our lives.  So i went i pulled a picture of what i see on a normal basis to create this page.


The background was first created using Distress Oxides so that they match papers from various Paige Evans collections. I chose a masculine palette to match the picture i am using.  Once the inks had been applied with a foam applicator so that they look like strips of color, a Kaisercraft stencil and a baby wipe was used to create the starry background.   Some ink was diluted and added to the bottom of each color strip followed by stamped images of stars using the Turn The Page stamp set and the respective inks.


While the inks completely dried, I went ahead and backed the cut out (created with a Just Nick Studio cut file) with papers from a few of Paige Evans collections (in case you don't know,  i have them all, have hoarded most of them, and love them all!!!).  A bit of foam adhesive creates the dimension look of the title.


After setting the title on the background,  the picture was backed and layered with the same papes used on the title.   Now to embellish, i went through all the collection pulling stars embellishments from papers, washi tapes and even fussy cutting some.  Gotta love the little rub ons stars from the latest Pick Me Up collection.


I pulled a few embellishments from the collections so that they will match the colors of the background, and even managed to tie a heart charm (form Oh My Heart ) to one of the paper clips from the Take Me Away collection.  Here is the final layout:


Love how this turned out!  I love documenting everyday moments,  as they are the ones that we take for granted sometimes, in a way that they become stars in my scrapbook journey.

Stop by Scrapbook Nerd to check for all the materials used in this page.  As always let me know if you have questions on how this was put together.

XO

Jul 24, 2017

Together


Scrapbook Layout created for Scrapbook Nerd's Summer On-line Camp                     - TOGETHER-


Hello there!

It has been a long time since I have been up on my blog, but we took a long planned vacation to my native Ecuador, and just arrived a a few days ago.     You will be seeing a lot of my work coming up as i have so many plans on the works.


Today,  I am issuing a new challenge at Scrapbook Nerd's Friends and Fans Facebook page for the on-line summer camp.  This time is all about FIX IT UP, which translates into using your editing programs to transform  a picture to fit into a project of your choice.


I always take pictures of my kids in series, so I used LR to create a film strip of some of the pictures of my kids, and also transformed into Black and White.   Next, i used the cut files (you can download them at the bottom of this page!!)  to create the background of my piece.


I used Page Evans's Oh My Heart collection to color block the hearts in the background, and added embellishments to match the colors.   Next I stitched around the speech bubble with the same color of the background paper (paper # 18 - Take Me Away collection).  I glued the heart background onto the paper, and used foam adhesive to attached the speech bubble paper to the mat.


To continue with the color blocking design, I used matching embellishments to add interest all along  the page, and added a bold color title to the page.  Here is the final design:


Love the end feel and look of this page!   I hope you can join in the challenges at Scrapbook Nerd's On line summer Camp.

Remember, I am a comment away if you need any assistance!

Take care!


Materials Used:
Take Me Away collection - paper #18
Oh My Heart collection - paper #4, 12x12 paper pad, 6x6 paper pad, all embellishments
Better Together collection - foam thickers
cut files:


May 10, 2017

Thumbs Up


Scrapbook Layout created for Scrapbook Nerd  -  THUMBS UP  -


Hello everyone!

We are half way this month's reveal for Scrapbook Nerd.   This month is all about florals for me, and for this project, I chose to use some water crayons, gelatos, and Paige Evans Oh My Heart collection.


It all started by creating this background using watercolor crayons and gelaton on watercolor paper.   I tried to pick some of the colors of the collection, and made sure that the colors were very faint.


This project uses the cut outs included in the 12x12 paper pad. I cut the border that framed the cut out, and backed it with papers from the collection.


Once all the cut outs were backed, I  used matching embroidery floss to create centers on all the flowers.  Using a paper piercing tool, a series of holes were created, and french knots were made in each hole.  This adds texture, and bring more color to the page.


The picture of my daughter and the little is perfectly framed with fussy cut flowers and ephemera from the collection.   The title of this page was created by gluing some of the chipboard stickers to the side of the picture.  Here is the finished page:


This page came together super fast and easily.  The mixed media background adds to emphasize the flowers colors.  Sometimes all it takes is a little experimenting to see how you can create a one of a kind piece just by altering a pre made cut a bit.  For all the materials used don't forget to visit Scrapbook Nerd, there is always something new being added to the store.

Remember I am a comment away if you have any questions on how this came together.

Take care!


Materials Used:
Watercolot crayons and gelatos - Faber Castell
12x12 and 6x6 paper pads - Oh My Heart collection - Pink Paislee
Stickers, chipboard stickers, ephemera - Oh My Heart collection - Paige Evans
Clear stickers - Starshine collection - Shimelle -AC

May 8, 2017

You Are My Bright Side


Scrapbook Layout created for Scrapbook Nerd  -  YOU ARE MY BRIGHT SIDE  -


Hello there!

I hope you all had a great weekend!   If you are a scrapbooker, then you know it was a busy one  for all of us, as we celebrated NSD.

It is my reveal week for Scrapbook Nerd, and the saying, "April Showers bring May Flowers" is what my projects are inspired by this month.  That's right, it is all about flowers for this week , which happens to be Mother's Day, too.   So let  me show you what I have been up to.


I was lucky to serve as the guest designer for this month's free SCT cut file, and I played with different designs for the  blog, here is one of the choices.   I started by cutting just the inside of the flower ring from white card stock.   The cuts were then  backed with different papers from the Oh My Heart collection from Paige Evans.


The picture of my niece in a field of dandelions was blown up to letter size, so that the image fit inside the ring.  I used thin fun foam to glue the cut  out to the picture, which had been glued to a piece of cardstock.


I created a cluster of fussy cut  flowers, ephemera and stickers to balance the flowers from the ring.   The title of  the page comes from one of the ephemera pieces.   To complete this page, I wrote the journal lines on the picture with a super fine marker, so that they are hidden.  Here is the final page:


I love this page,  the colors, the flowers, and the large picture are perfectly balanced.     You can find the cut file at the Scrapbook and Cards Today magazine blog, and all the materials used in this page come from the Scrapbook Nerd store   ( I love these ladies!!)

As always let me know if you have any questions on how this came together.


See you all tomorrow!


Materials Used:
Cut file - SCT magazine blog - May 2017

Patterned paper collection, ephemera, stickers, chipboard stickers, washi tape - Oh My Heart - Paige Evans - Pink Paislee
Foam stickers -Take Me Away collection - Paige Evans - Pink Paislee

Apr 13, 2017

Right Now


Scrapbook Layout created for Clique Kits  - RIGHT NOW -


Hello Clique friends!

 Today, I am sharing a new project created with the beautiful "Jellybean" kit, and one of the exclusive cut files included in this month's kit; I think the entire DT is in love with this cut file, not to mention the colors and patterns in the kit!


 This project is the happy result of the fusion of scrapbooking and Bible Journaling,  as it was created inspired by the  beautiful cut file, the colors in the kit, but above all Psalm 9:1, "I will give thanks to you , Lord with all my heart;  I will tell of your wonderful deeds" 


 To frame the beautiful flowers cut out, I chose to go all artsy,  and use a combination of watercolor, ink, stamps and gelatos to create the background of the page.  Using the packaging technique, some green ink was spread on the page.  A little bit of gelatos was then smeared on the  page using some water and watercolor


  Once all these dry, I used the new Altenew's Daisy layering stamp, that can be found in the Clique Store - to add just a few of the outline  of the leaves.   I have created  a small video on how the page was created, so sit and enjoy!


I hope you like the video!  As you can see, even when i mistakenly  smeared ink on the page, the beautiful flowers (created with the exclusive cut file and Paige Evans' Oh My Heart collection  paper #14  -both included in the Jellybean kit- ) cover a large amount of the background, so the big smeared just becomes a hint of color under the flowers.


 I created this page after working on my Bible journal,  and since I had just taken the picture for an updated head shot, i used the page as  a ways to journal about me and what i am thankful for.


    For the title, the beautiful wood piece in the Jellybean kit fit this layout perfectly.  So i simply added a thin layer of gold acrylic paint, and then gold embossed the letters for that added shine in the page  ( i love the end result!).  Here is the final layout:  


  I am happy with the end result of this page (even when the subject of the layout is me!).  The inspiration i found in combining my Bible journey, the Jellybean kit and color soothes my soul.  I hope you like it, too!  If you are not a subscriber, there is still a few a la carte Jellybean kits available, so don't forget to check the store.

 I am always  a comment away if you have a question on how this came together.

 Thanks for stopping by!  


Materials Used:
Clique Kits - April Kit
Cut file - Clique Kits - April Kit
Gelatos - kiwi, lime, limoncello - Faber Castell
Shimmer watercolor - Artist Loft - Michaels
Hampton Arts Ink Pads
color shine - citron, gold- Heidi Swapp
Altenew - Small daisy stamp
Heidi Swapp gold acrylic paint
Zig Embossing powder -gold

Apr 7, 2017

Smile - Altered Frame Project


Project created for Maya Road and Xyron Product Swap  -  Altered Frame - SMILE -


17630140_10213134689950309_5827602304531626283_n

Hello Roadies!
Nathalie here, to welcome to the last day of the Product Blog Swap between Maya Road and Xyron.  I hope you have been inspired by all the beautiful products the team has put together using Maya Road goodies, and the Xyron adhesives.

SMILE-15


I received the Xyron Creative Station Lite for this swap, and it has been love at first sight from then on.   The ease with which this machine adds adhesive to different materials makes working on projects a breeze, not to mention mess-free.


SMILE-11


 My daughter's cork board is full of Instax pictures, but she hates putting them away in the albums with the tack holes in the frame.  So I set to create a sort of frame/decoration piece that will house the pictures and add some sort of organization to her room, too.   I purchased an inexpensive shallow shadow frame for this project.   After retiring the plexi glass cover, I used a hand drill to create a hole at the top of the back of the frame.  Here I used a Silver Bulldog Clip, and secure it to the frame using a silver brad from my stash.


SMILE-3


I run  fun foam through the Xyron  Active Station Lite so that i could use it to add dimension and secure pieces in this project.  Some of the foam was then  run through the machine a second time, so that it had adhesive on both sides of the foam.


SMILE


To add the sentiment /focal point of this frame, I used a Silhouette store cut file to cut the word "Smile" , three times, from  white card stock , and once from a paper from Pink Paislee's Oh My Heart Collection.   Since the word is just 5" in height, i was able to run all the pieces through the Xyron Active Station.


SMILE-2


All the cut-outs were then attached together  to create dimension on the word.  The newly formed piece was then attached to an 8x10.5 in piece of paper form the same collection, and then glued to a letter size piece of white card stock.  The card stock was now placed on the frame using a few of the foam pieces to the top of the page, so that it can be secured to the bulldog clip.


SMILE-9


To complete the look of the cut out, a small Vintage Butterfly Tranparency was glued to the word, and a small resin heart from the "Oh My Heart" collection was then added using a small piece of the foam adhesive -created with the Xyron station- to the dot on the "i" .  Now to the fun part, embellishing!!


SMILE-14


 To complete the frame, I pulled a few Maya Road goodies  to create a swag at the bottom of the card stock page.  The double sided foam adhesive created with the Xyron Station worked to secure and add a bit of dimension to some of the pieces.


SMILE-5


 The bottom swag was created using a few  Cream Felt Blossoms as the base for the swag;  two Ballerina Pink Tulle  Mini Blossoms were then added to each side of the swag.  A   Buttermilk Tulle mini Blossom was then placed at the center of the cluster.


SMILE-6


To add some more color to the page, and define the shapes of the flowers, a few leaves were created using a paper from the collection, and the With Love Nature Steel Die.   The new milk white Resin diamonds, along with some pieces from the Pearl  Mum Trim, Pearl Button Trim, and  Pearl center trim were  scattered around the flowers.


SMILE-7


To complete the swag, a pair of wood tokens were added to the corners of the swag,  one from the Wood Love Token collection, and another from the Wood Thoughtful Sentiment Token collection.  The mixture of textures works great in this large cluster.


SMILE-8


To finish the cluster -also to anchor the swag, and to repeat elements in the project-  a small Bow Tie Clip was was glued below the white tulle flower.  In addition to tie in the colors of the paper collection, a few of the collection's chipboard elements were added to the project.  Here is what the final project looks now:


SMILE-13


Even after adding the small adhesive foam pieces,  the dimension of the flowers was perfect even after sliding the plexi glass cover in the frame/shadow box.  I really love the end result, and now this project can easily serve as a frame and/or decorating piece in our home.
I hope this serves as inspiration to create a project for your home.

 Thank you Xyron for the Active Station Lite, it is one of the most helpful machines in my craft room, now.
Don't forget to leave comments on this weeks posts.  A lucky comment will win a Gift Certificate to the store!!

I look forward to seeing what you create!

  Nathalie-desousa-signature


Materials Used:
22 mm Silver Bulldog Clip
Vintage Butterfly Transperancy
Cream Felt Blossoms
Ballerina Pink Tulle  Mini Blossoms
Buttermilk Tulle mini Blossom
With Love Nature Steel Die
milk white Resin diamonds
Pearl  Mum Trim, Pearl Button Trim, and  Pearl center trim
Wood Love Token collection
Wood Thoughtful Sentiment Token collection
Bow Tie Clip
Oh My Heart collection - Pink Paislee - papers, chipboard stickers, resin hearts

Mar 31, 2017

My Personal Journal

field-notes   Hello there! I hope you are enjoying all the projects that the beautiful April kit, "JELLYBEAN", and that they are inspiring you to use every single piece included in the kit.  The papers, embellishments, and the exclusive printables are so versatile, and perfect to use in all kinds of paper projects.
CK_Apr17_Kit4
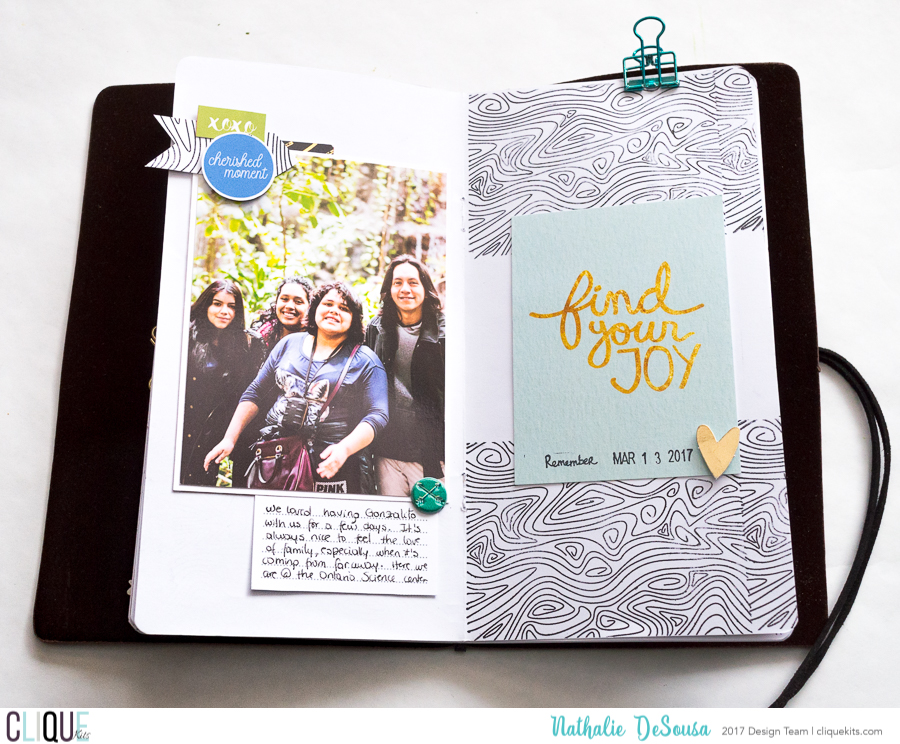
 I have kept a journal throughout my entire life.  The format has transformed to the years, but once I discovered Traveler's Notebooks a few years back, i have been hooked on them.    I try at best to make at least a daily entry on my journal, it works as my PL format.  This month, I have loved adding bits and pieces from the JELLYBEAN kit to my journal.

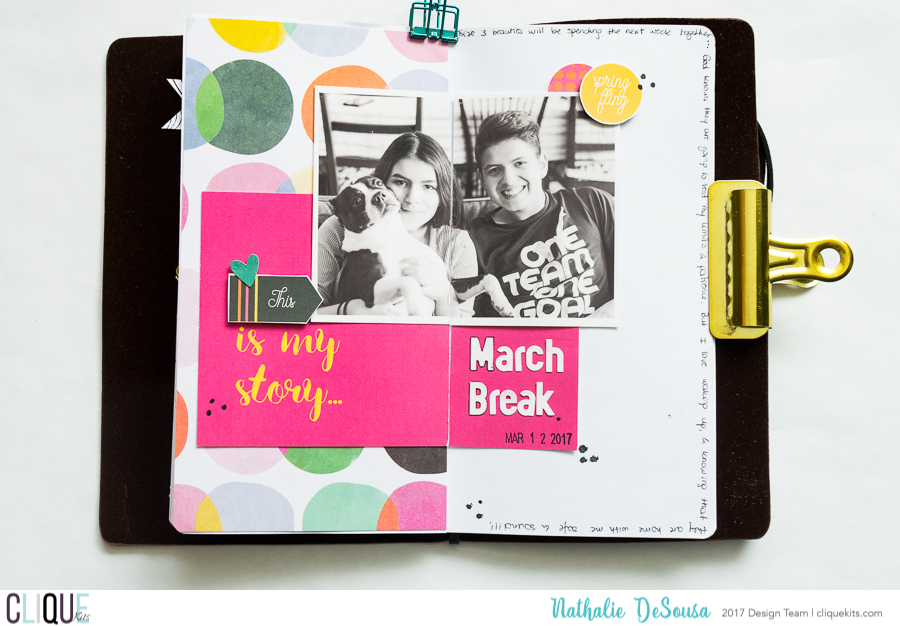
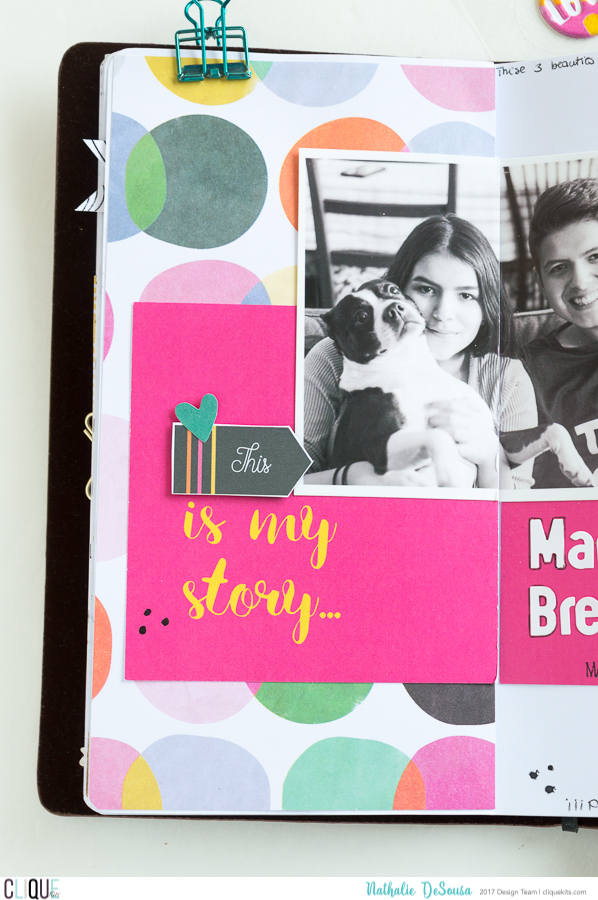
  CK_Nathalie DeSousa_April2017_My Personal Journal-3  This month's challenge sponsor is Latina Crafter; their stamps are just gorgeous.  I was lucky to receive this beautiful wood veneer stamp, which i used to create the background on one of my TN entries.   Using archival ink, I stamped the image at opposite edges of the TN's page, and a small piece of white card stock.  Once I placed the picture on the opposite page,  I used the stamp card stock to create a small arrow that tied the two pages together.  The PL cards included in the kit, and the exclusive printables are just perfect when documenting in this format.   CK_Nathalie DeSousa_April2017_My Personal Journal-5   My next entry is all about my kid's first day of Spring Break ( we survived!!).  For this entry, I  used the small scraps of the Oh My Heart paper #  to cover one side of the page.   The large PL card, included in the Jellybean kit, was then glued across both sides of the TN - I simply cut the card with the paper trimmer, and glued it to the TN-
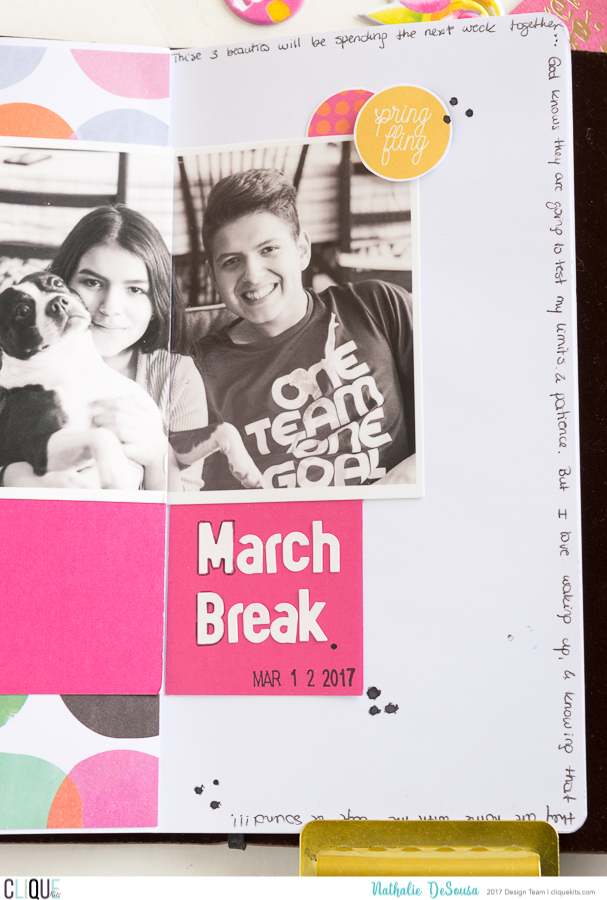
.   CK_Nathalie DeSousa_April2017_My Personal Journal


   CK_Nathalie DeSousa_April2017_My Personal Journal-2   


Once again, I used this month's exclusive printables to add interest to the page, and the small letter alphas from Elle's Studio, included in the kit, are just the perfect size for this entry.  I am always trying new ways to journal on my pages; this time, I chose to write along the edge of the page!.

  CK_Nathalie DeSousa_April2017_My Personal Journal-6


 Finally, the last entry i am sharing with you, is just a fitting example of how versatile the kit is,  and how easy is to document in a TN format.   Once again, I picked  the last piece of the Impossible paper -included in the kit-, and covered one side of the TN.  The beautiful ephemera pieces from the Make Your Mark collection  serve as the sentiment and embellishment on the page.


  CK_Nathalie DeSousa_April2017_My Personal Journal-7


 By using the TN on a landscape format, I was left with  a large space to add my journal lines (this entry is all about me, and how happy my DSLR makes me!).  I balanced the page, by adding some of the ephemera pieces, and a sentiment fussy cut from the cut-apart paper from the JELLYBEAN kit. I hope these all serve as inspiration to take a look at Traveler's Notebooks, and how to use the kit when documenting in this format.  TNs are versatile, and work for many different types of memory  keeping/ planner/ art journal.  Clique Kits has just launched a new subscription program all about traveler's notebook, just click here to see all about this new venture. As always i am just a comment away, if you have any questions on how any of these came together.   Thanks for stopping by!


  CK_DT17-headshots-Nathalie


Materials Used:

Clique Kits - Jellybean Kit
Stamp - Latina Crafter
black velvet color shine - Heidi Swapp