Showing posts with label free cut file. Show all posts

Dec 12, 2018

HOLLY JOLLY Holiday Hop


Hi there!

A few weeks ago, Ashley Horton invited me to be a part of the Holly Jolly Holiday Hop, of course i said YES!  Well today is the day, and i get to also enjoy all the Christmas inspiration from some of my friends and other crafters.  We all have had putting our projects together, here is my project:


Did I mentioned that Ashely created the awesome cut file and you can get a free copy of it - just click here for the free cut file - I used some of my stash for this page; the Sugar Plum collection from a few years back was perfect to document my littles on Christmas day!.


Love the pastel colors accented with the gold details and mixed media, here is the video that shows you how it all came together:

Remember to continue the hop to be inspired by all the lovely projects we have created!
As always, if you have questions do not hesitate to contact me!
  Here is the list of the participants so you can join the hop:

Amanda-Jayne Baldwin - https://youtu.be/egT_3J75wW0
Ashley Horton - https://bit.ly/2B6RF6e
Audrey Yeager - https://youtu.be/o83PUgxhhbk
Cat Martin - https://bit.ly/2GlOLjI
Christine Meyer - https://youtu.be/qgbyAol_Ct0
Erica Thompson - https://youtu.be/o-CuQueNeWY
Kelly Janes - https://youtu.be/s_3GqeJsQwk
Missy Whidden - https://bit.ly/2PwSIBy
Nathalie deSousa - https://bit.ly/2L9x8CN <<< YOU ARE HERE>>>>
Orange Gearle - https://youtu.be/rE8R2qIOuvo
Sasha Biyanova - https://youtu.be/QxcTPj8bG_o
Theresa Moxley - https://youtu.be/5EwzPQP09lI
Have fun!!


Dec 1, 2018

Merry - Altered art-


 Hi  there!
It is starting to feel and look a lot like Christmas, and what better way to celebrate the beginning of the season than to share cut files! For the next 12 days, JustNick Studio will be giving a cut file a day for free!  So, let's get started!


Today's free cut file is "Build a Poinsetta", and it is the perfect cut file to create beautiful layouts and cards, but how about a decor piece for your home, well...


Every few years we change the color of the Christmas tree decorations, and this year our daughter decided the colors: blush, white and blue-gray.   The new colors mean that our Christmas decorations also have to be revamped a bit, so i decided to create this piece to for our home.


 I pulled a Jillibean embroidery hoop and painted to match our wood pieces.  While the paint dried, i used today's free cut file, "Build a Poinsetta" to cut the pieces for the flowers from papers that matched the tones of the tree ornaments.  A bit of Vicki Boutin Art Crayon helps to add the shading to the petals, while a bone folder helped to create the movement of the flowers and leaves.  To finish each flower, I added a few french knots to the center of each flower.


To add the sentiment to the hoop, i decided to pull the  Merry and Bright cut file and used only the "merry" word of it to create the stitched sentiment on the hoop.


To assemble the piece, i added some small branches created using a soon-to-be-released "Holiday Boughs" cut file, and then glued all the pieces to the hoop.  I added a piece of ribbon to the top of the hoop, so that the piece can also be hung from the tree or around our home.  Just love how this turned out!!!


Now it is time for you to visit the store to get your free copy of this cut file, so:
Enter the code: POINTFREE at checkout to get this design for free.
This code is only valid until midnight CST on December 01, 2018.
No purchase necessary. Coupon code must be entered to receive this item for free. No refunds will be given.The design will still be available in the JustNick Store for purchase after the discount code expires.

I cannot wait to see what you create with this cut file!  As always please do not hesitate to contact me if you have questions on how this was put together.
XO

Oct 25, 2018

PSL

Scrapbook Layout created for Citrus Twist Kits  - PSL -


Hi there!
Everything around me is FALL and i love it!!  I love the season for so many reasons, but i think PSL has to be up there in the list of my faves!  So, I  took advantage of the Sweater Weather add on kit from Citrus Twist Kits to create a layout about our love for Pumpkin Spice Latte, and Cinnamon tea for my daughter!.


It all started with the Cup of Joy Cut file -available for free at the CTK shop -, and all the beautiful papers from the Simple Stories Forever Fall collection that are included in the kit.  I used my Silhouette to create the cut out and used them to paper piece the cup.


Before starting the paper piecing, i embossed a few leaves on white heavy cardstock, and then used Distress Oxides to bring the Fall tones to the background. 


Once it was all ready, I backed the picture of our cups  -which happen to match the colors of the cup-  with some of the papers i used, and attached it to the background.   Then i glued the paper cup on top of the picture, so that it looks like it is tucked into the cup. 


To embellish the page, i pulled the chipboard and die cuts from the Sweater Weather kit  -they are from the Forever Fall collection from Simple Stories- and added a few clusters around the picture and the cup.   This month's Little Things Stamp set from CTK had all the stamped sentiments, which complete the clusters.


For the title, i pulled a few more embellishments and the Amy Tangerine alphas included in the kit to create a small title in a cluster at the bottom of the page.  A few lines of journal and some gold ink complete this page:


Love how this turned out, unfortunately the Sweater Weather kit has sold out at the CTK store, but all the rest of the stamps, embellishments, cut files, and stamps can still be found in the store, so stop by to check them all out.

As always let me know if you have questions on how this all was put together.

XO

Oct 17, 2018

Hello Amazing Fall

 Scrapbook Layout created for Scrapbook Nerd  - HELLO AMAZING FALL -


Hi there! Nathalie with you today to bring you a new project inspired by the colors of Fall.  This week we will be creating projects inspired by color, and i wanted to show you how to build a color family background using acrylic paints.


 The colors used here are the ones in a Fall sunset (i found the colors by doing a Pinterest search, "Fall color palette"), and were replicated using Acrylic pop paints    The key to having a cohesive look to the background -not harsh transitions between the color stripes- is to build the colors using a same color base.  This means you start with the lightest color, in this case yellow, and create the colors using this as a base.  The background color will be the one that softnes the transitions and help create a cohesive color family.   The following video will show you how this page was put together:


   How simple and colorful is that background?!  The color stripes are the perfect base to bring the rest of the layout to live.   The simple stenciled details are just subtle enough to add interest to the stripes


 The leaf cut outs and stamped flowers are a great way to create clusters in this page without losing a large part of the background.


  The smalls pop of gold complement all those ephemera pieces and stickers from Vicki Boutin Field Notes and All The Good Things collection.


 The title brings the warm tones of Fall into this page, and complete the golden look of a modern Fall layout.


Remember to stop by Scrapbook Nerd to check all the materials used in this page, and all the new goodies that are always arriving at the store.   As always please do not hesitate to contact me if you have questions on how this came together.


 XO,

Enjooy Today

Scrapbook Layout created for Vicki Boutin DT  -  ENOY TODAY! -


Hi there!
 Nathalie with you today.   This week Jana has challenged all of  us to create embellishments for our projects. Since Vicki just released her first free cut file, what better way than to combine both to create this week's project!...


The leaves were the starting point of this layout; since i had cut them from white textured cardstock, i used the VIcki Boutin art crayons  in a fall palette to create the watercolor look on them in two ways.

VB_ENJOY TODAY_Nathalie DeSousa-4

All the full leaf cut outs were smooshed on art crayon pigment, and then a few drops of watercolor were added (a great way to cheat watercolor).  Also using the same art crayon colors and one of the Junque Journal watercolor papers an entire sheet of watercolor paper was created to back the outline paper leaves.   A few gold and copper leaves were glued to the leaves using matte acrylic gel.

VB_ENJOY TODAY_Nathalie DeSousa-6


The cut file was also used to cut some leaves from the watercolor paper.  All the leaves were stitched to the center line as to add texture.  To create the background, I mixed a bit of green art crayon with a bit of gray art crayon, from the neutral set, the new tone was added in an inverted "v" shape to a gessoed foundation paper using a brayer.   Once it dried, the same color of art crayons was used to stamp some of the images from the Escape stamp and die set along the background.

VB_ENJOY TODAY_Nathalie DeSousa-2


Since we are all about DIYing our embellishments, I decided to cut some of the journaling spots from the 12x12 paper pad, as well as a few butterflies from one of the collection papers.   The journaling spots work perfect as layers behind the picture, while the butterflies help bring interest to the page.     Just a few extra embellishments from the Field notes were added to create small clusters around the picture.   The title was created using one of the ephemera pieces, a  little bit of gold splatters and the project is done!


The colors and shine in the page are perfect to document a picture of one of our walking advventures around our neighborhood.   You can see more details on how this came together in the following video.


Remember to stop by Vicki Boutin's Mixed Media community on Facebook to get a copy of the free cut file used in this page, and also to join this week challenge.  AS always please let me know if you have questions on how this came together.

XO

VB signature


Materials Used:
Foundation Paper
Gesso
Warm, cool and neutral art crayon
Matte Acrylic Gel
water brushes
bottle mister
Escape stamp and die set
12x12 Paper pad - Field Notes
Ephemera, journaling spots, watercolor stickers, Chipboard stickers, puffy Stickers - Field Notes collection

Jul 4, 2018

My Personal Journal


Traveler's Notebook layout created for Scrapbook Nerd  - HELLO SWEET SUMMER -


Hi there,

Nathalie is back with you with a bit more inspiration using the new Scrapbook Nerd free cut file, Time to Shine.  This time, I chose to show you how the designs can be used in a different format such as a Traveler's Notebook.


  For this spread, the ice cream cone of the design was cut so that it fits within the limits of a page of the TN.   The shape was then backed with papers from Doodlebug designs Cream & Sugar and So Punny collections.


   To make the details of the cut-out pop, a piece of paper from Fancy Pants Joy Parade collection.  I chose to add the title of the page right onto the cut out using a combination of stickers and die cuts from both Doodlebug collections, and Pinkfresh Studio's The Mix 2  


  In order to balance the spread, I chose to layer pieces from the Chit Chat ephemera pack from the So PUnny collection from Doodlebug, and use some of the papers to back the picture.


  To ground the picture, I added a strip of the Fancy Pants design and a few more details from Paige Evans Stickers tablet.


   I love how this turned out, and now it is your turn to put the cut file to work in a project of your choice.   Stop by Scrapbook Nerd to pick a free copy of the cut file.

 Remember to tag @scrapbooknerdca whenever you are sharing projects created with the digital cut files on social media,  We would love to see what you do with the cut files.

take care!

A Splash of Summer


Scrapbook Layout created for Scrapbook Nerd  -  A SPLASH OF SUMMER -


Hi there! Oh, the glorious days of summer are well spent at the pool!  well, at least my littles love to come over and spent their days at our pool, so the new Time to Shine cut file( available for free at Scrapbook Nerd storie) is perfect to document these precious memories.


 I chose to use the large title in the cut file to express the sentiment of the page.  I made sure to enlarge the title so that it covers a large portion of this page, thus become the focal point of this page.


 A few Distress Oxides and a stencil, the watery background was created on Marshmallow Cardstock from Bazzil. 


While this dried, the title was backed with papers from the Poolside collection from Fancy Pants Designs. To add dimension on the page, the title was attached with some foam adhesive, then it was all about embellishing the page! 


  The Poolside collection is filled with lots of die cuts and ephemera pieces that are perfect to document those pool memories, so it was a breeze to create clusters on the page.


 This page was so much fun to create, and it just screams Summer and good times.  Remember to stop by the Scrapbook Nerd Store to pick your free copy of the cut file,

Take care!


Apr 3, 2018

Sister Love


Scrapbook Layout created for Scrapbook Nerd - SISTER LOVE -


Hi there!

It is the beginning of the month, which means a new cut file release at Scrapbook Nerd!!!


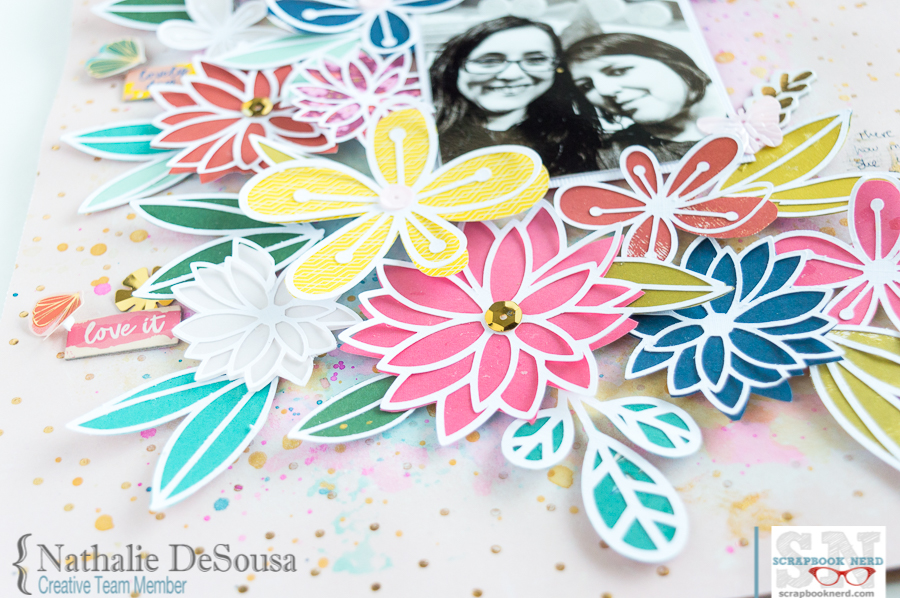
The new cut file -designed by the Cut Shoppe-  comes perfect for the Spring season, so I took advantage of the design to create a cascade of flowers in my page.


The flowers were cut to measurea at the largest 2.5 in.    Once all the flowers were sized,  they were all cut from white cardstock.


All the flowers were backed with papers from the Pick Me Up collection.  However the center of the flowers were the only ones glued, so that there is some movement on the flowers.


All the leaves were backed with papers from the Pick Me Up and Turn the Page collection, making sure to chose just green colors for them.  The entire cut outs were glued to the paper this time.


Before gluing anything to the page, a bit of mixed media was added to the background.  A bit of white acrylic paint and Jane Davenport's Mermaid markers add a soft colorful bakground for the page.


The picture was propped on some fun foam, and set on the page.   Then all the flowers and leaves were glued using some foam adhesive.  They were attached so that they surround the picture (in a half moon shape).


To create the title for this page, a combination of stickers from the collection were used.  Then the page was completed with a few embellishments from the colleciton.   Cardstock stickers, sequin, ephemera, and stickers complete the page.


Just love the large cluster of flowers in the page.   This page is the perfect way to celebrate my sister, and our relationship.   Remember to stop by Scrapbook Nerd to pick up a free copy of the cut file.   I will be around if you have questions on how this came together.

Take care!