

Hi there!
I am so excited to have
been invited as a guest designer for a few months here at Technique
Tuesday. I love stamps because they are one of the most versatile tools
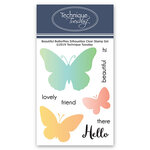
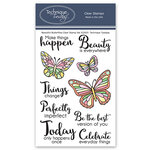
when memory keeping, and this month’s new releases, Beautiful Butterflies and Beautiful Butterflies Silhouettes, were the inspiration for the layout that I am
sharing with you all today.

To start this layout,
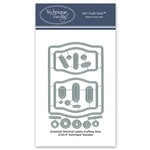
I created a series of labels using the Essential Stitched Dies from different patterned papers. The idea was to create a column of labels
that resembled a tiled background loosely.
However, I did not glue the labels to the background.

Using color inks -to
match those of the papers- a series of images from the Beautiful Butterflies stamp sets were added onto vellum. I chose to emboss all the images using
different embossing powders so that they have a two tone look on them. Since the color ink was used to stamp the
images, the underside of the butterflies has
a different color that the embossed side of them. These were all fussy cut and set aside.

To construct the
layout, the Beautiful Butterflies Silhouette
stamp was used to
create silhouette images of the butterflies around the labels in coordinating colors to the ones used on
the vellum butterflies. Some of the
stamped butterflies were added before gluing the label to the background while
others were added above the labels. To
each silhouette, the coordinating vellum embossed image was added with glue
dots, so that dimension was created on the wings.

To finish the page, a
few embellishments were added to some of the labels, and around the picture in
clusters. The title was then added by
using one of the labels created with the Essential Stitched Dies and a sentiment from the Beautiful Butterflies stamp set.

I hope this has
inspired you to use the new Beautiful Butterflies and Beautiful Butterflies Silhouettes in a project of your own. I have prepared a small video to show you how this came together:


Nice to look here free robux websites to more fun
ReplyDelete