Showing posts with label large title. Show all posts

Dec 9, 2019

CAPTURED - Freckled Fawn


Hi there!
It is that time of the year when everything is so busy and colorful, but my little heart always goes back to black and white (my favorite color combo ever), so when i got this month's Freckled Fawn kit, i think i squealed a bit!


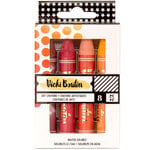
My first choice is always mixed media, large titles and handstitching... So i played with my Vicki Boutin Art Crayons and create an ombre background for my page.   While that set,  i used my Cameo to cut the title from one of the papers and handstiched the letter using matching thread to the one on the background.


I wished the kit came with a collection of these wooden frames.  I wrapped some embroidery thread (coordinating color) around the edges of the frame and glued a picture of our baby behind it. 


The chipboard stickers in the kit are fabulous, so i used a few of them to frame the picture.  I added a few of the past kits god enamel dots so it helps to warm up the page a bit.  Then added my journal line about our beautiful boy under the picture.


To complete the page,  i added two clusters of labels , washi tape and enamel dots at diagonally opposite sides of the page to help balance the page and create a focal point in our page.


Just love how this turned out, and how fun it was to put together.  I am so in love with the Freckled Fawn 6x8 December kit that i am thinking about purchasing a new one!!  remember to check it out.

As always please contact me with any questions about this page!

XO

Nov 11, 2019

MERRY & BRIGHT - Simple Stories


Hi there Simple Stories friends!

 Nathalie with you today with a new project that brings the joy of the Christmas season to a layout.  When i saw the new  Simple Stories Say Cheese Christmas, I knew that the colorful designs and papers will be perfect to document this picture of our Goddaughter as an elf last Christmas.


I started by creating a fun title for the page. I chose an alphabet from the Silhouette store, and cut each  letter from different papers from the Say Cheese Christmas collection.  In addition, i arranged the letters in order -for the title- and created an offset around the words.  I cut this offset from white cardstock and used it as a base to handstitch the letters of the title together.


For the background of the page, i chose the Sn@p Basics Hickory/Cream grid paper .  I chose to fussy cut a few florals form the Making Spirits Bright paper and attached them around the  outer edge of the background using foam adhesive


Once the title was glued to the background, the layout came together quickly,  First i used a few of the papers to frame the picture and add layers behind it.   I tucked the picture under the title, and started to add small embellishments around it,


All the cute and festive stickers and ephemera pieces were perfect to add sentiment to this page.   Plus they are so easy to combine that it makes this page come together in just a few minutes.


I hope this has inspired you to check the new Simple Stories Say Cheese collection.  You are going to fall in love with the designs, colorful images and how versatile it can be.

Til'next time


Sep 2, 2019

WONDERFUL MOMENTS TOGETHER - JustNick Studio


hi there!
Nathalie with you today to kick start Word Week.   I love large bold titles, so this was an easy assignment for me, specially when i get to work with some of the JustNick Studio designs. 


For this page, i combined the Moments, Word 3, and Love List cut files to create the large title/background.   Since i am using a non-white background, i chose to cut each image from white cardstock.


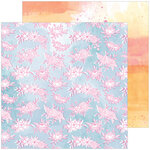
I used the new Pinkfresh Studio Just A Little Lovely collection to back the letters of the Moments cut file.   A bit of foam adhesive between the patterned paper and the cut out create dimension on the cut out.


I cut each word separately,and then glued them together before attaching them to the background.    Once the title was in place, i added a picture of my kids and littles at the top of page, nestled in the "wonderful" word.


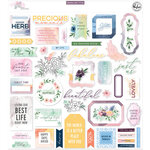
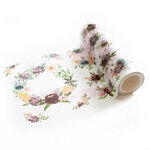
To decorate the page, i used the new Pinkfresh Studio Painted Florals Washi tape and coordinating dies.   I clustered the image together to form a visual triangle in the page, then added some phrase stickers and gold ink splatters.


I love how this turned out, and how easy it came together.   Mixing and matching word cut files from JustNick Studio will surely yield a one-of-a-kind image for your next project.  Make sure you check them all up!
XO,


Materials used (images contain affiliate links)

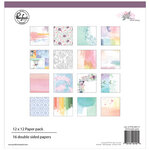
Pinkfresh Studio - Just A Little Lovely Collection - 12 x 12 Paper Pack Pinkfresh Studio - Just A Little Lovely Collection - 12 x 12 Double Sided Paper - Around Here Pinkfresh Studio - Just A Little Lovely Collection - 12 x 12 Double Sided Paper - Possibility Pinkfresh Studio - Just A Little Lovely Collection - 12 x 12 Double Sided Paper - One Fine Day Pinkfresh Studio - Just A Little Lovely Collection - 12 x 12 Double Sided Paper - New Thoughts Pinkfresh Studio - Just A Little Lovely Collection - Ephemera Pack Pinkfresh Studio - Just A Little Lovely Collection - Phrase Cardstock Stickers Pinkfresh Studio - Washi Tape - Painted Floral Pinkfresh Studio - Dies - Floral Elements Pinkfresh Studio - Dies - Floral Cluster Pinkfresh Studio - Everyday Musings Collection - Layered Cardstock Stickers

Jul 30, 2019

BEACH, SAND and SUMMER SUNSHINE - JustNick Studio


Hi there!
Nathalie with you today bringing you a new layout that celebrates Summer.   With so many beautiful cut files in the JustNick Studio shop, sometimes all it takes is a bit of mixing and matching to bring your ideas to live.  This is one of them!


Love a large title layout!  To create this page, i reached for the   Beach Sand SurfSunshine on my Mind and Summer cut files.   I played with the words -in the Silhouette software) to create  a vertical design that had movement and could be quite colorful.


It all started with adding a bit of mixed media to the background -Vicki Boutin Art Crayon-, while this set, i used the Silhouette Cameo to weld the words in the title and cut it from white cardstock.


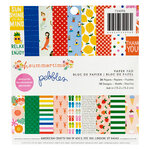
I used the machine to also cut the letters to fill the cut out from colorful papers from the Pebbles' Oh Summertime collection.  This helped when backing the title.


I added the picture at the bottom of the page, right under the title and used some of the collection's stickers and ephemera pieces to embellish the page.  I love how this turned out, all the colors scream summer, and the large title is perfect for the picture of some of my family while in vacation..


Remember to check the JustNick Studio Shop for all these cut files and the many more added  weekly.   If you have a question on how this came together, please contact me!
XO
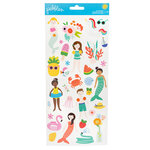


Materials Used   (Images contain Affiliate Links)


American Crafts - All The Good Things Collection - Stencil Brush Set American Crafts - All The Good Things Collection - Mediums - Art Crayons - Set 1 - Warm American Crafts - All The Good Things Collection - Mediums - Art Crayons - Set 2 - Cool Pebbles - Oh Summertime Collection - Cardstock Stickers with Glitter Accents Pebbles - Oh Summertime Collection - Ephemera with Glitter Accents - Icons Pebbles - Oh Summertime Collection - Ephemera with Glitter Accents - Phrases Pebbles - Oh Summertime Collection - 6 x 6 Paper Pad with Glitter Accents Pebbles - Oh Summertime Collection - 12 x 12 Double Sided Paper - Taking A Dip Pebbles - Oh Summertime Collection - 12 x 12 Double Sided Paper - Bee Happy Pebbles - Oh Summertime Collection - 12 x 12 Double Sided Paper - Lobsters Pebbles - Oh Summertime Collection - 12 x 12 Double Sided Paper - Under The Sea Pebbles - Oh Summertime Collection - Clear Stickers - Tiny Simple Stories - Sunshine and Blue Skies Collection - 12 x 12 Cardstock Stickers - Combo Pinkfresh Studio - Office Hours Collection - Mini Puffy Alpha Stickers - Coral